
With reality and impatience biting at my heels (see previous post), I decided to improve my patience at a later date and, instead, deal with ‘reality’ by cleaning the tank with a revised process that can be done safely indoors.
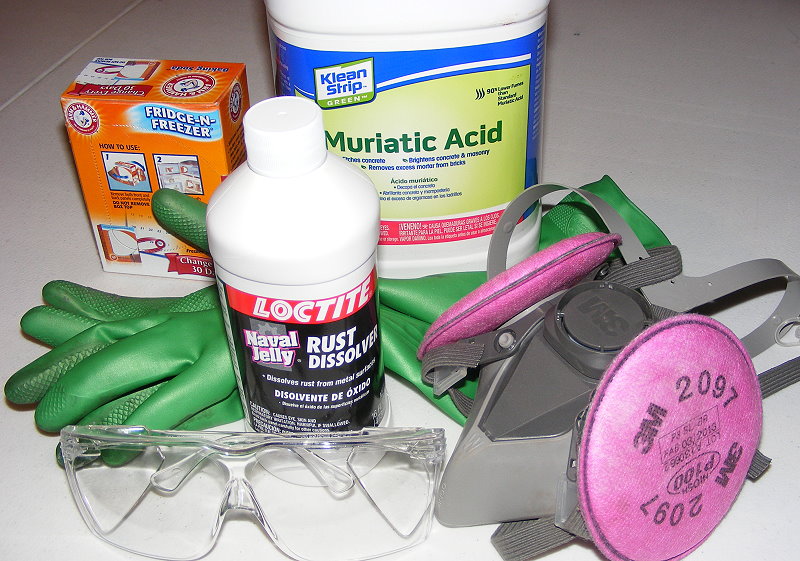
Materials
Muriatic Acid
Two Boxes of Baking Soda
Naval Jelly – 16 ounces
Heavy Duty Duct Tape
Utility Sink
Blow Dryer
Safety
To do this indoors, the “safer” muriatic acid with 90% fewer vapors has to be used. Vapors from regular muriatic are too nasty to use indoors.
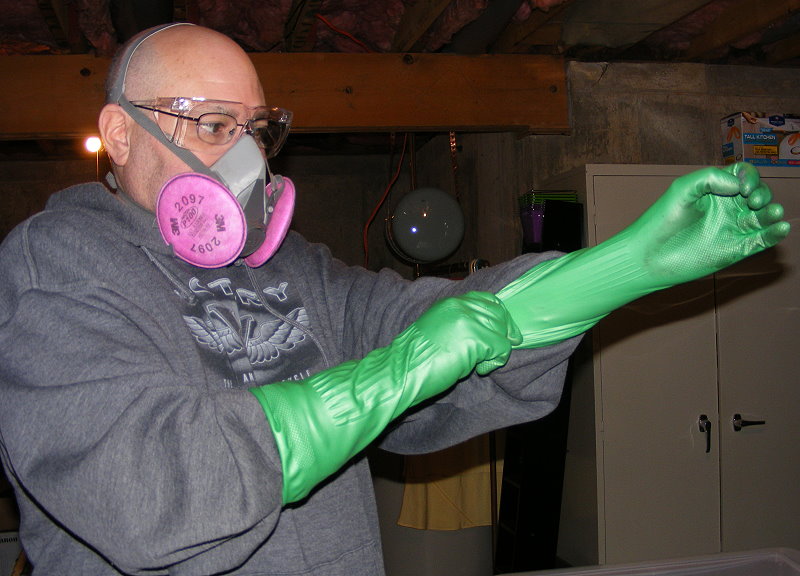
Wear old clothes with long sleeves. Use rubber gloves and eye protection/goggles. Even with the ‘safer’ muriatic acid, a mask isn’t a bad idea.
The process
 Tape the tank’s openings, except the gas cap hole, with duct tape. Carefully, mix half a gallon of acid with half a gallon of hot water. Always add acid to water—do NOT add water to acid. Pour the mixture into the tank. Tape up the gas cap hole.
Set the tank on one side for about ten minutes. Then, switch to another side for ten minutes and so on. Rotate the tank like this for ninety minutes to two hours.
In the utility sink, mix 1 part baking soda into 10 parts water (1.6 cups baking soda into 1 gallon of water).
Side Note: As I’ve written before, my posts are about what works for me as neither a pro nor expert. My way may not work for you. If I didn’t have a utility sink, I’d do the neutralizing outside with two buckets—one to mix the neutralizer, the other to flush the acid from the tank. If one bucket is larger, use the larger one to flush the tank.
After rotating the tank, it’s time to rinse the acid from the tank. Slowly pour the acid from the tank into the utility sink containing water and baking soda. It will fizz so don’t be alarmed. Give it a few seconds and pour a little more from the tank until empty.
Continue adding water to the tank and rinsing into the sink until the yellowish orange stuff is done coming out of the tank. Shake the tank with water in it to make sure all areas of the tank are thoroughly rinsed. By now, all but tiny residuals of the acid are rinsed out, so it’s now okay to drain the neutralized mix from the utility sink.
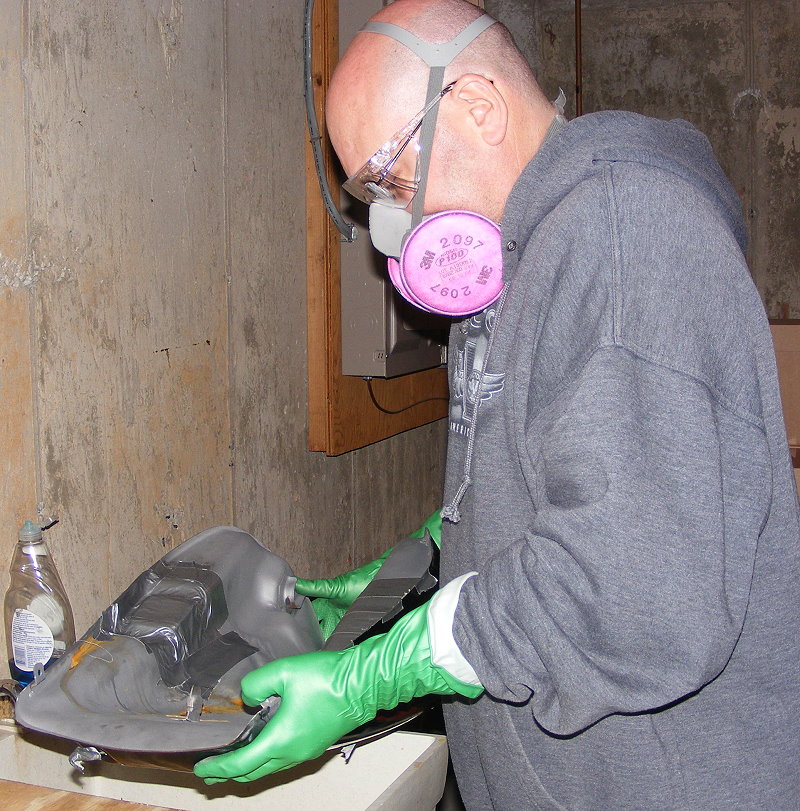 Re-tape leaky tank holes, pour the naval jelly in and finish re-taping. Do this immediately after flushing the acid to avoid flash rust from developing in the tank.
Shake the tank for a minute or two then let it sit for 30 minutes. After 30 minutes, shake it again turning it in all directions to cover every interior surface. Do this occasionally for 2 hours. Then, thoroughly flush the naval jelly from the tank with water.
Dry the outside of the tank. Duct tape a dryer on warm setting—not hot—to an opening in the tank to dry the inside. (Oil can be distributed on the inside of the tank and let to dry but it’s not necessary.)
A note about tank liners
My tank has a liner that’s lifted from around the fuel tap and gas cap. I’m not sure if it’s original factory liner or aftermarket applied by a previous owner. Not that it matters.
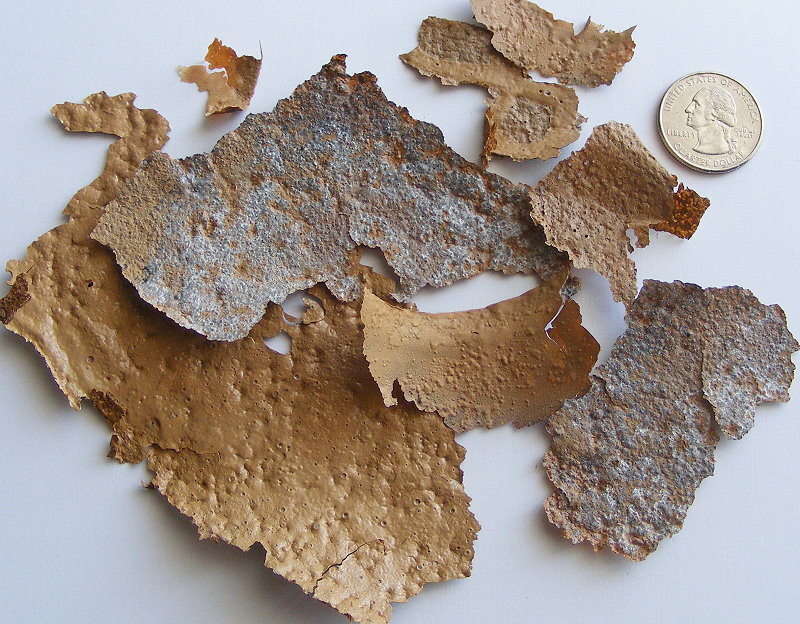
All loose liner was removed from my tank. When I got my hands on the material, I first thought it was large flakes of rust, except that it molded perfectly to the inside of the tank. I mean the “flake” was a mold that showed every tooling mark and imperfection, no matter how tiny. Rust doesn’t do that so it had to be tank liner. And, so it was.
Now, the in-tank factory fuel filters were removed when rebuilding the fuel tap. They were damaged beyond use. Research indicated stock filters are available as a separate part. They appear to be factory pressed into the fuel tap. That means if you want factory in-tank filters to keep liner and stuff out of your fuel delivery, you buy a new fuel tap. There are alternative in-tank filters for bikes and four wheelers. None fit the ZN.
Some riders don’t re-filter when the originals fail. I don’t have that kind of luck. My luck would be the bike suddenly shuts down or runs poorly because it’s starving for the gas that it can’t get cuz junk is clogging up the works. So, an in-line filter (not my 1st choice but better than nothing) will do the trick for now.
While finishing this post, I just found two other in-tank filters. If they don’t work, I’ll simply stick with the in-line filter. It’s positioned where it’s easy to see if it needs to be changed. And, the filter is about three bucks. Really, that can’t be beat and it’s so much better than being stuck on the side of the road.
A final word/opinion about tank liners, especially aftermarket liners. Don’t do it. It’s an easy way to mess up a tank. Especially don’t apply new liner over old liner. It’ll most likely peel in short order…nobody needs that kind of mess.
Next: Prepping the fuel tank for paint