
Buddhism teaches me that nothing is permanent; all things change. When it comes to breathing life back into old bikes that have been sitting for a length of time, there is one constant: All carburetors need to be cleaned. Alright…I’m openly twisting Buddhist views about impermanence. Buddhism doesn’t have carburetors in mind when educating about impermanence, but it does help to make a point.
Anyone who has done it knows that cleaning a cruddy carb can be tedious. If something—no matter how small—is missed, the entire process may have to be started from scratch. Even when there’s attention to every detail, the process may have to be started over and over again because of some small contaminate.
Having said that, I’ll go out on a limb here and say that writing about carb cleaning can be just as tedious, if not more so. While I’ve somewhat sarcastically referenced the abundance of internet experts, there are several good websites that describe carb cleaning in some detail. Some have detailed pics too. So, there’s no need for me to reinvent the wheel here.
The ZN owns four Mikuni BS34mm CV carburetors. These carbs are kind of common and found on different makes of that era such as Honda, Kawasaki, Suzuki and Yamaha. There are/were better carbs but the BS34s aren’t bad carburetors.
Manuals are, without a doubt, helpful but sometimes the details are lost in translation. For instance, the manual may say to remove the whoosie-whats from the Johnson rod with a reference to photo #20 which looks like a black blob with some gray lines here and there. If I don’t know what or where a whoosie-whats is then I’m not going to remove it from a Johnson rod, am I?
I like the following two sites for carb cleaning. The first is actually a YouTube video. The tutorial video (below) shows a Mikuni BS34 being taken apart for cleaning and put back together. While the video doesn’t actually show any cleaning, it’s a good reference to see how the pieces fit together.
The second website gives the reader a detailed explanation of the carb cleaning process. It has lots of good pics to accompany the text, and I love seeing pics when dealing with stuff like this.
Like I said, manuals can be good, but there’s no comparison between a black-and-white photo in Clymer’s Manual measuring maybe two or three inches square and a color photo on a website with arrows pointing to tiny parts that can be enhanced and enlarged.
There’s a third site that’s interesting. It lays out in detailed language how to take apart the carb, where to point a spray can of carb cleaner and what to watch out for while doing it. For example, make sure safety glasses are in place because the spray will come right back at the eyes.
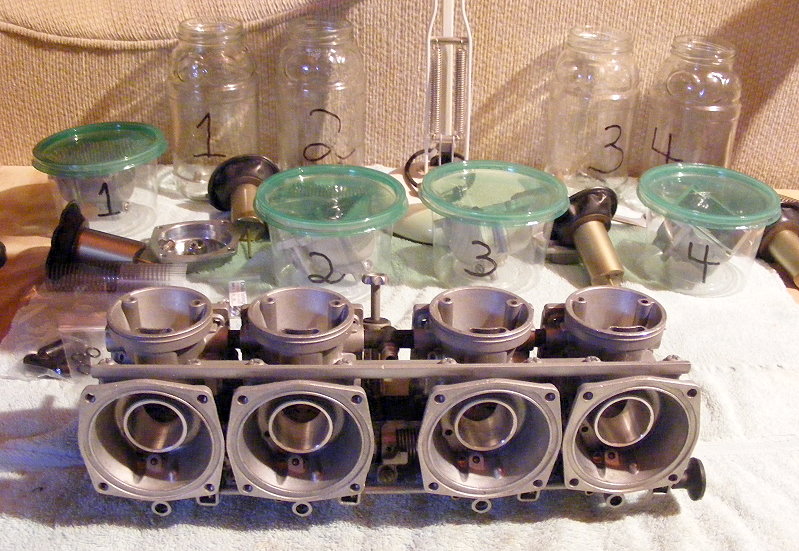 The ZNs carbs weren’t terrible and didn’t warrant breaking down the bank of four for cleaning. But, many gaskets were worn or brittle and needed replacing. A few float bowl and float needle retainer screws were stuck and the heads stripped while trying to remove them. After drilling and extracting the stripped screws, the rest of the work didn’t hold any surprises.
Here are some useful tips and tricks that I found while surfing for information:
- Get a shop manual
- Take plenty of pictures
- If possible, use Japanese Industrial Standard (JIS) driver bits. They fit the machine screws properly.
- To clean holes and jets (among other things), I use this handy Wire Spike Cleaner Set.
- Be extremely careful with the diaphragms. They are expensive. I’m still suffering from sticker shock.
- If a diaphragm tears, stay calm. It may be repairable with a nitrile glove and gorilla glue, tool dip, liquid electrical tape and a treasure trove of other ingenious materials/methods easily found on the net.
- To thoroughly check the diaphragms, they need to be held up to a light in a dark room. You won’t see small holes or perforations looking at them under normal conditions.
- If a float pin is really stuck, try a little bit of heat from a butane torch…aimed away from the plastic floats, of course.
- After the carb boots are bolted to the manifold, install the clamps and lubricate the inner surface of the boots with WD-40, electric grease or silicone. Doing this will make them easily slide into place.
- I used acetone to soak the small bits—after removing the gaskets and other rubber parts. People have used all kinds of things—carb dip cleaners, diesel fuel, vinegar, Pine-Sol, Simple Green, Sea Foam and the list goes on and on. It’s important to know what will damage the rubber parts and what won’t. For instance, carb cleaner will turn rubber parts to mush.
- It’s a good idea to synchronize the carbs after cleaning, even if the carbs weren’t apart from the bank. More on that at a later time. Right now, I’ve got to get this ZN started!
(click photos to enlarge)


Next: What to do after dropping parts in the motor