
Back in the day, the 1100 Kawasaki was a muscle bike. It started for Kawasaki in 1972 with the Z1, if in fact I’m remembering the day. Built to be badass on the street, the early Zs were a force to be reckoned with.
The ZN was a muscle bike with amenities: air-assisted rear shocks, air-assisted front forks, shaft drive, king-queen seat and so on. Air-assist suspension developed over the years and, by today’s standards, the OEM suspension on the ZN is just about passable. While it’s not horrific, it’s a bit mushy really.
To old timers like me, air shocks generally say touring bike like Honda’s Gold Wing. Air shocks don’t say bobber. In fact, lots of bobbers have no rear-wheel suspension at all. Hard tails look cool, I guess, and young riders with good spinal health can probably ride one (for a while). As far as I’m concerned, I never understood the attraction to (orthopedic) traction.
Just because a person can do something doesn’t mean he/she should do it. The ZN needed something in between air ride and spine crusher.
Besides changing exhaust systems, Harley riders frequently change OEM shock absorbers to whatever makes the ride lower. Based on the number of HD Sportster shocks on eBay, it seems to apply especially to Sportsters.
I picked up a decent set of HD factory spec 11.5” Sportster FXR shocks on eBay for $30. The shocks were in decent shape with low miles. They’re the typical coil over shock and look more like a bobber than the original large-bodied air shocks.
Not that it mattered to me, but the chrome was in great shape. They promptly made their way to my sand blasting cabinet, where they met highly abrasive media at 125psi. The pretty chrome didn’t stand a chance.
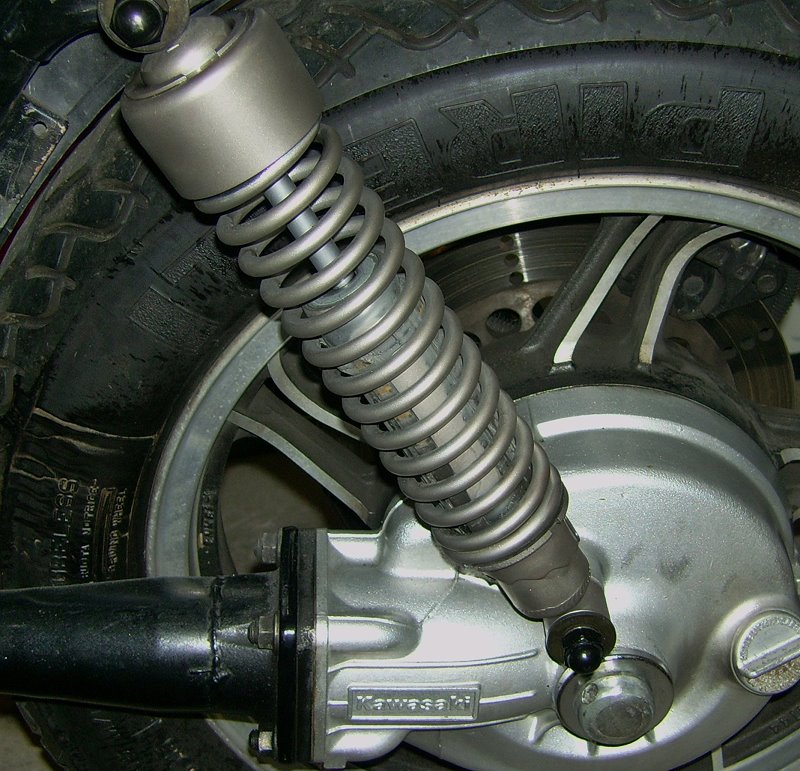
Sportster shocks work well with the ZN. The spring rate fits the bike. No more mushiness. They lower the ZN’s rear without dragging parts. They fit around the ZN’s final drive case. Yes, the Sportster shocks fit well—except for the bushings.
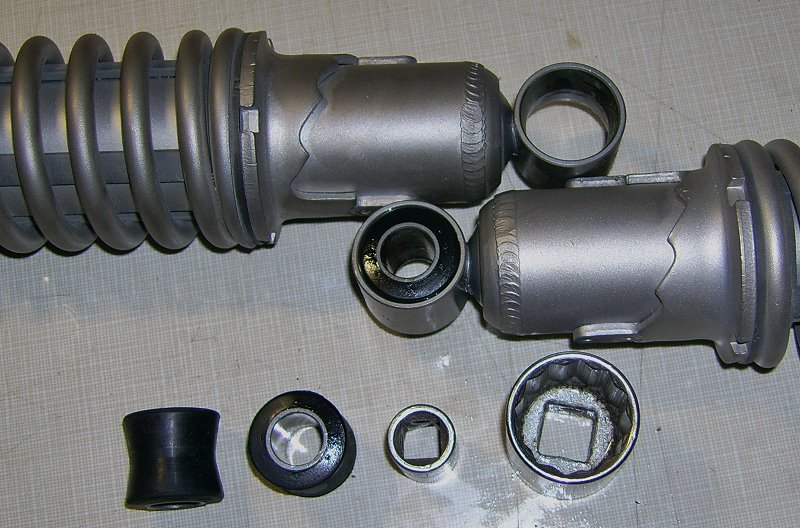
If the ZN is going to run HD Sportster shocks, the ZN bushings must go into the Sportster shocks. There’s no way around it. Putting the ZN bushings in the Sportster shocks is the only solution.
The metal sleeve in the middle of the Sportster bushing is just a hair smaller than the sleeve in the ZN bushing. Because the Sportster sleeve is smaller, the shock won’t fit over the ZN mounting studs. And so the fun begins…
To remove the bushings, I used a bench vice and some sockets—one with an OD smaller than the bushing and one with an ID larger than the bushing. Put one socket on each side of the shock eye that holds the bushing and crank it all together in the vice. The smaller socket pushes on the bushing, moving it through the shock eye and into the larger socket opening. Liberal use of lubricant is a must. I used B’laster All Purpose Lubricant because I couldn’t locate my can of Liquid Wrench Dry Lubricant which would have been the better choice on this project.
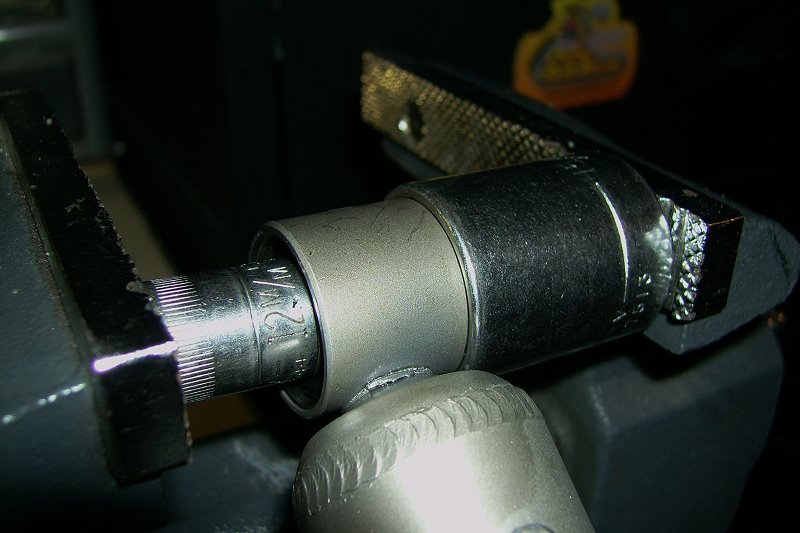
Some folks use a large C-clamp instead of a bench vise and squeeze. Good luck with that. Some folks use a hammer and whack the hell out of the bushing. That, to me, is like riding a hard tail…I don’t think so.
Getting the bushings out wasn’t painless. The first one seemed to take forever, probably because I became obsessed with trying (too) many different socket combinations. Once I figured it out, the second bushing took about ten seconds to remove.
With the bushings removed from both the Sportster and ZN shock absorbers, it was time to put the larger ZN bushings into the Sportster shocks so the Sportster shocks would mount to the ZN studs. Installation of the larger ZN bushings required ‘customization’ with a Dremel and a Sanding Band.
Progressive Suspension sells bushing kits for approximately $20, plus shipping. Being that it was the start of a federal holiday weekend, I didn’t have $20+ and a week or more of wait time to give.
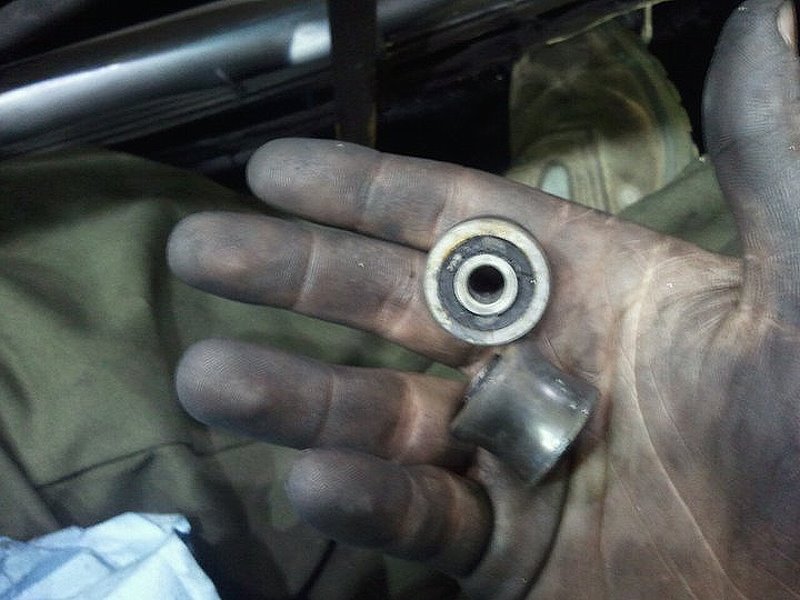 Now although I may be a bit of a neat or clean freak, getting my hands dirty doesn’t matter. The ‘freak’ part happens after the work is done. Things need to be cleaned up reasonably well and put back in their place. I don’t think about getting greasy and grimy on a job, up to a point. That ‘point’ isn’t reached very often and—when it is reached—it means things are pretty gross. Sanding the bushings led me to that ‘point’ kind of fast. The small black rubbery grime mixed with wet lubricant wasn’t fun. Of course, I could have forked over a few hundred of bucks to purchase brand new Progressives or whatever…yeah, right.
I’m not sniping Progressive. Their stuff is top notch. I’ve had the pleasure of riding on their shocks, springs and other goods. In fact, it’s usually one of the top five things I look for when putting together my daily rider. It just doesn’t make logical sense on this build, at this time.
Any old how, the bushings fit tight as a drum. The shocks fit eye to eye and lowered the ZN just enough (bonus). The shocks look good after peening them in the blast cabinet with glass beads. And, best of all, I won’t become a regular at the orthopedist’s and physical therapist’s office.
Next: Assembling an exhaust system (2 of 3)