
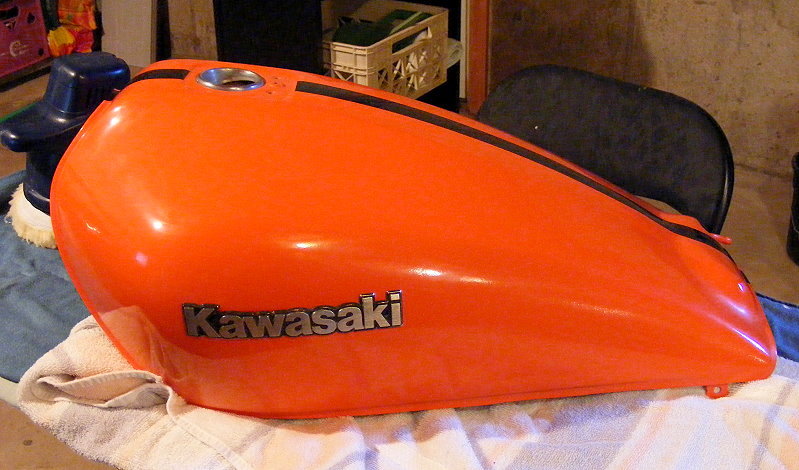
After reading a multitude of internet threads about painting motorcycles, here’s how I painted the ZN’s tank using just rattle cans. Yeah, you really can do that—or so I’ve read—so I decided to give it a shot…both out of curiosity and budget consciousness. I used this method based on what seemed to make sense to me.
Next time, I may try for the more professional approach using an air compressor and paint gun; but for now, this rattle-can method worked out better than I thought it would…and I’m no Rembrandt.
Preparation rules
Good quality preparation is a MUST.
MATERIALS
- Body Filler
- Primer – Epoxy Primer, Filler Primer, Sealer Primer
- Painting Prep Cleaner/Solvent, Acetone or Alcohol
- Paint
- Wet/Dry Sandpaper (80, 100, 220, 400, 600, 1000, 1500, 2000, 3000 grit)
- Tack Cloth
- Buffer Machine
- Rubbing Compound, Polishing Compound, Swirl Remover
- Terry Cloth Bonnet, Foam Bonnet, Wool Bonnet
My method
Step One – Removal
- Remove the tank from the bike. Tape off or remove all parts on the tank.
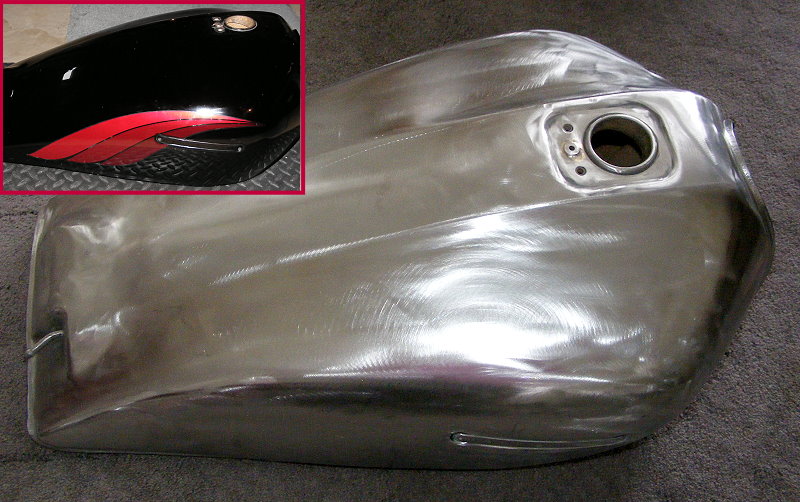
- Remove the old paint (see previous post). Even if the old paint looks okay, there’s no way of knowing for sure that it’s sealing. Also, there’s no way of knowing the history of the old paint. Sand blasting and 3M Sandblaster Discs on an angle grinder work well. Be sure to sand all the way around the fuel filler hole really well with 100 grit paper.
- To remove sand stuck in the pores and cut the sharp, rough spots that will pop up when sanding after sand blasting, sand the tank with 100 grit paper.
Step Two – Body Work
- If the part needs body work, this is the time to do it. If not move on to Step Three.
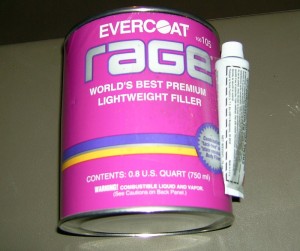 Always, and with no exceptions, use body filler that requires hardener.
- Follow the directions on the filler can to mix the proper amount of hardener with filler. Combine the two using a rigid plastic spreader.
- Pinholes are a result of trapped air in the body filler. To avoid trapping air, fold and pull/flatten the mixture to squeeze out air bubbles.
- Once the hardener is introduced, the mixture begins to set-up quickly. In other words, there’s a limited amount of working time once mixed.
- Basically, fillers should be sanded with 80 grit and finished with 220 grit.
- Pinholes also result from applying the filler too thick. To eliminate pinholes in the application, use pressure in a pulling motion to squeeze out air bubbles.
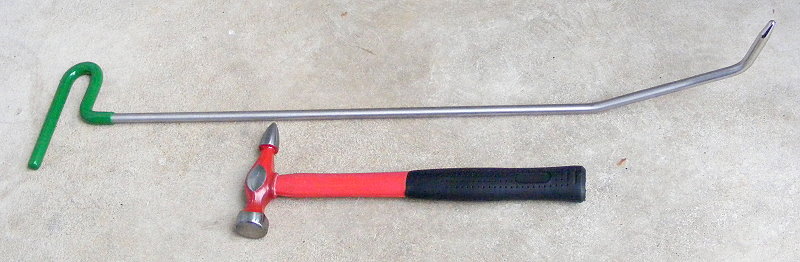
- The tank has a small dent in the front left corner. Thankfully, it’s not deep, but still noticeable. To remove as much of the dent as possible and allow me to use less filler, I employed a PDR Double Bend Tool (below) and tapped down the high spots with a hammer.

- To get down to business, sand the dents, including 3 or 4 inches around the dents, with 80 grit sandpaper.
- Add the filler to the dents. Be liberal with it and make sure there’s good coverage beyond the dents. Don’t worry about being neat with it because it will be sanded anyway.
- After the filler has hardened—the time will vary by temperature, humidity and filler brand—it’s time to start sanding.
- Start with 100 grit sand paper and then move to wet sanding with 220.
- Now, some folks cover the filler with Glazing and Spot Putty especially to fill in pinholes. I didn’t apply the putty and didn’t notice a problem.
- Wet sand with 400, 600, 1000 and 2000 grit sandpaper. Dry the area with a cloth and let it sit overnight.
Step Three – Priming
- Prime the tank as soon as possible to avoid contamination issues. It’s best not to wait more than a day.
- Paint the tank with two coats of epoxy primer. Some folks use Self-Etching Primer over bare metal. I like the sealing properties of epoxy and use etching primer when painting over chrome.
- For rattle cans, warm the primer in hot water then shake the can well.
- Hold the can upside down and press the nozzle for a couple of short blasts to clear the nozzle of dust or old paint.
- Wipe down with PRE, acetone or alcohol and wait for it to dry.
- Tack cloth the tank.
Step Four – Sealing
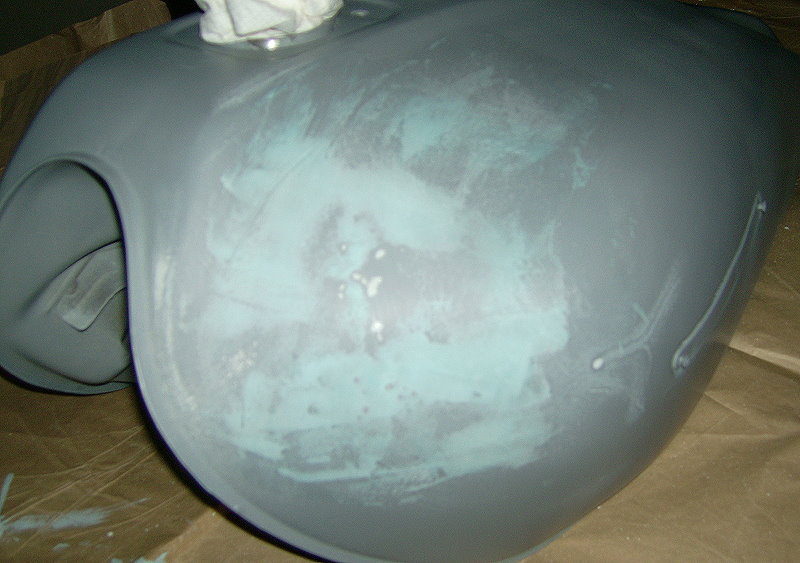
- Some skip this step but I applied three or four wet coats of filler (or high-build primer) and let the tank sit overnight.
- Next day, shoot on one or two coats of sealer primer or epoxy primer. This leaves a smooth and flat surface with a consistent color as the base for painting. Let the tanks sit for a day or two.
Step Five – Painting
- Scuff the tank. Clean it with PRE, acetone or alcohol and let it dry. Tack it.
- Apply the base coats and clear coats according to the manufacturer’s instructions.
- Apply several coats while waiting the appropriate time between each coat.
- Wet sand between coats if there are paint runs.
- When finished painting, let the tank sit to dry for several days, perhaps a week. To help bake the paint, a heat gun or hair dryer or heater can be used.
Last Step – Buffing
- Fill a small flat pan and/or a spray bottle with water and a little bit of liquid soap.
- Begin sanding with 600 grit sand paper to knock down the small pebbles and debris that attached while the tank was drying.
- With lots of water, move to 1000, 1500, 2000 and 3000 grit.
- Wash the tank soapy water and rinse. Dry it with a towel and tack it.
- Buff with progressively less aggressive compounds and pads finishing.
- Terry bonnet and Rubbing Compound
- Foam bonnet and Polishing Compound
- Wool bonnet and Swirl Remover
- Don’t wax the tank until the tank has fully cured. If using Rustoleum paint which is relatively soft until fully cured, that can take weeks or months. No rush.
There are several things to keep in mind:
- Poor preparation results in a poor paint job. Imperfections at the primer level will be ten times greater after paint is laid down. Paint does NOT hid imperfections.
- Don’t touch the surface with bare hands (or dirty gloves) after cleaning and before painting. The oil in hands sticks to the tank and cause fish eyes in the paint.
- Orange peel is inevitable. Even professionals will spray some orange peel.
- I never believed this but it’s true – Practice spraying. The spray should be light enough so there are no runs…and heavy enough to try to avoid orange peel.
- Be patient and don’t rush.
- If there’s a mistake, it can always be fixed.
And that’s all there is to that!
Next: Getting rid of sand in the gas tank