
Things were going along very well…with the operative word being “were.”
The carbs were finally sorted out and ceased pouring gasoline onto the garage floor through the floats. The bike started several times. The idle was rough. That was expected because the next step was to tune and sync the carbs. After that, road test time!
Unfortunately, strange things started to happen after a few starts. Without going into each and every detail, the bike’s electrics got worse with each start and attempted start. It got to the point where the system would stay on even with the ignition key in the “off” position…and the key removed.
Out came the wiring harness (again) and—this time—I realized that the wires are brittle. Some were broken or partly broken. Many of the connecting pins were loose.
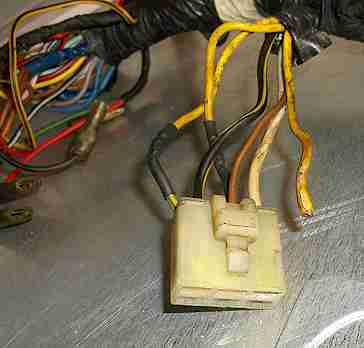
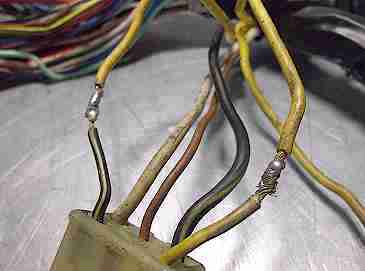
All things considered, the wiring was toast and not worth attempting to test and fix each and every wire. Here’s the OEM wiring diagram for the ZN.
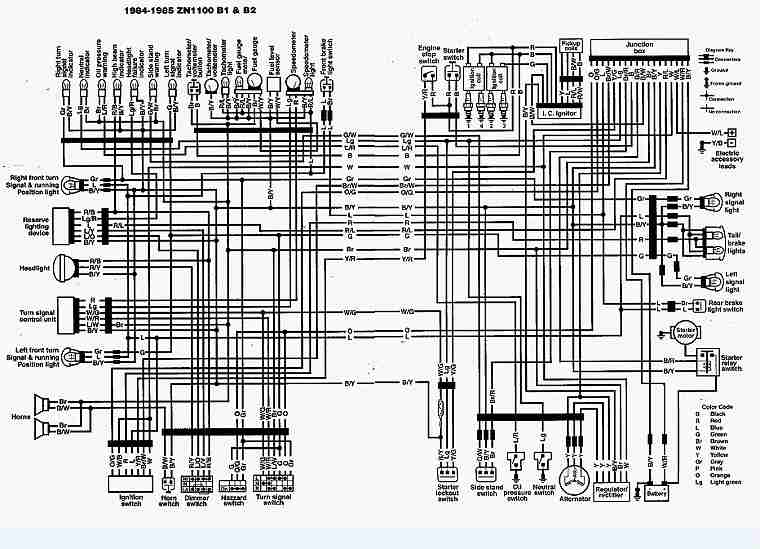
Yeah…what a mess of wires, connectors, fuses, relays, diodes and so on. As far as electric wiring goes, I never ‘got it.’ The above diagram is evidence as to why.
Every time I tried to understand the dark art, I’d glaze over after a few minutes of reading. I’m not a stupid person, but electric wiring is like chemistry for me. Okay, maybe I am stupid…
Now, the ZN without electrics is a beautiful pile of parts. So, I need to ‘get it’ if the bike is going to move down the road.
The first option is to find someone who makes wire harnesses for old bikes. There are relatively few. The best that I found is Sparck Moto. I traded many emails with Matthew, who tirelessly answered all my questions, no matter how basic. These guys are doing something right because wait time—right now at the height of riding season—is four weeks or more.
The other option was for me to figure it out and fix it on my own. The best thing at this point would be to disregard dealing with the OEM wiring harness and diagram. It’s overly complicated for a bobber anyway. As a bonus, I can get rid of even more electrical assemblies and turn this ZN into more of a bobber.
It’s just my, but…when a bobber build retains a big ole OEM dash full of lights and junk, it’s no bobber and it looks bad. Bobbers are stripped down, minimalist bikes.
So the first order of business is to draw up a new wiring diagram. With help from loudvhx on KZrider.com, we came up with this diagram.
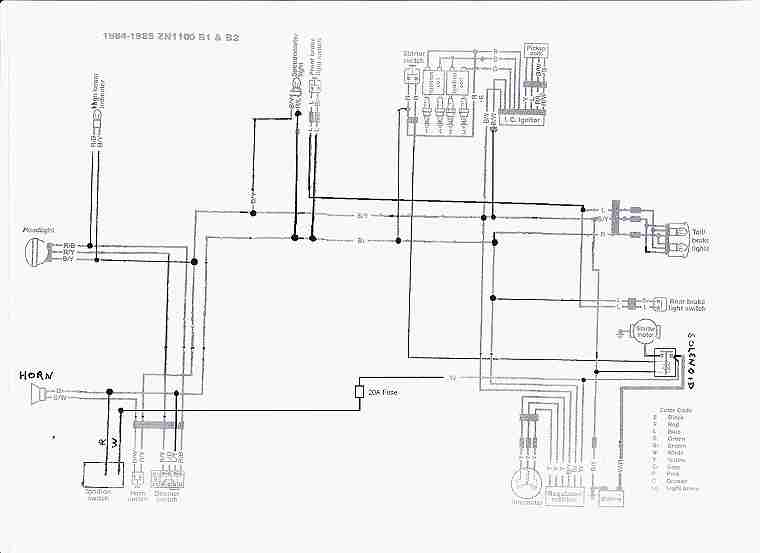 It’s easy to see there’s a big difference between the Kawasaki diagram and a ‘bare bones’ concept for a bobber motorcycle.
I used to complain that things were going too slow. Well, things are now moving at a snail’s pace on the ZN simply because I never ‘got it’ on the electrics.
Now, I’m making diagrams, working on connectors and wires, figuring out how to turn a paper diagram into a working system and more. Here are my suppliers for this project. For connectors, I go to cycleterminal.com because they have “OEM Japanese Wiring Terminals, Connectors, Kits and Supplies” and shipping is super fast. Primary wire and miscellaneous stuff comes from Amazon because we have Amazon Prime, which has saved me a small fortune in shipping costs.
As of today, I believe all the supplies are either on hand or in the USPS pipeline. Now, the real fun is about to begin.
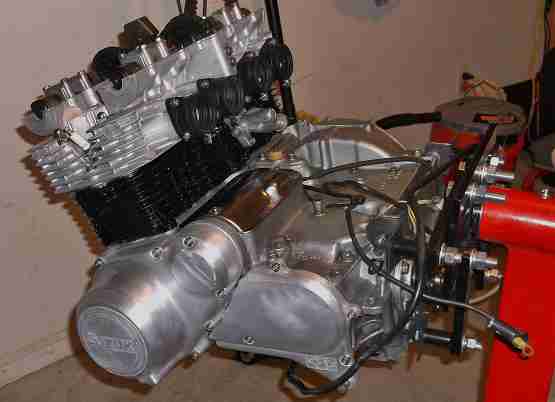
On the other hand, the Suzi 850 motor is back together and ready for the frame…after the ZN has power.
Next: A short update