
Fun stuff here! While the majority of the work up to now has been necessary or hopefully makes the ZN run better, bobbing the tail may be cosmetic for the most part but it’s probably the first thing people notice when looking at a bobber. This ZN sports a bobbed tail with a fabricated rear bar/tail piece (see Step 4 below). The rear bar looks utilitarian or industrial while adding an attachment point for strapping on a bag or gear.
It was easier to write the last post in steps. I’m all for easier. So if there are no objections, here we go again.
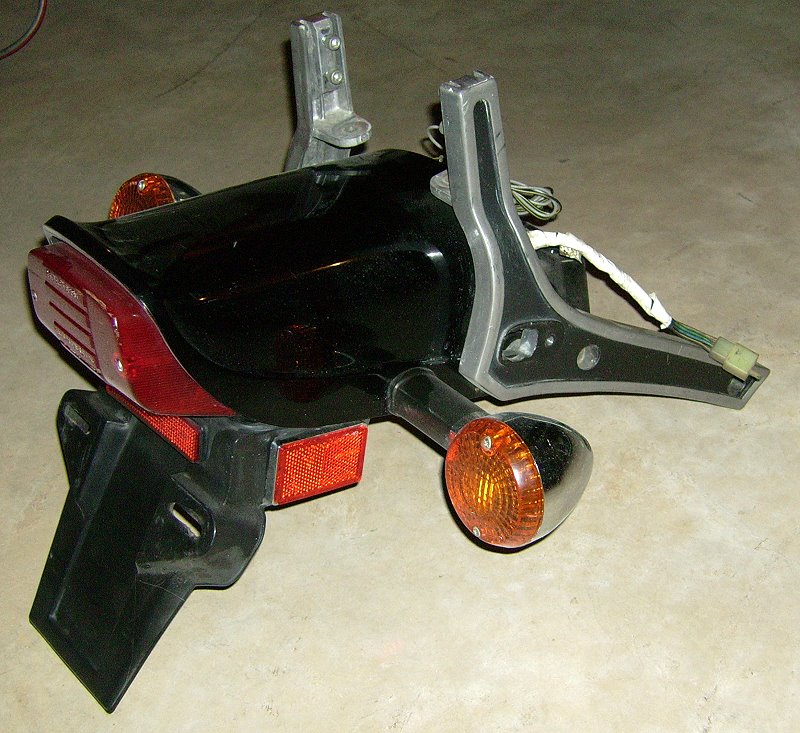
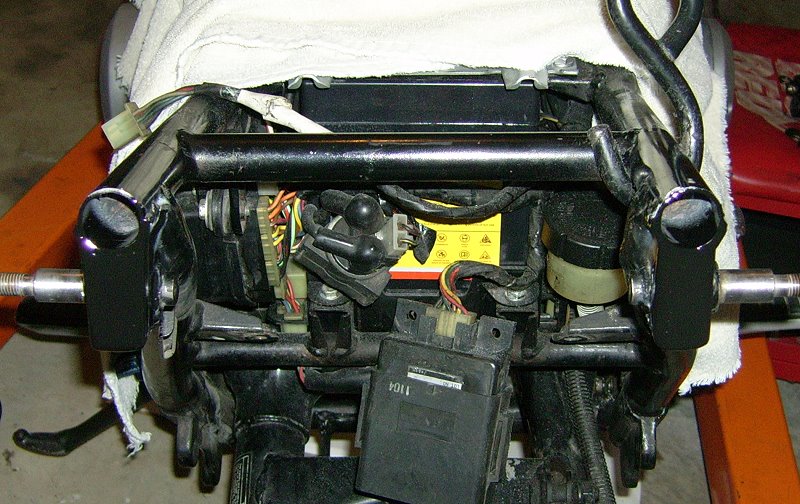
Step 1: Remove the tail piece
This is the easiest part to the process. The ZN’s tail is removed by unbolting a few bolts and unplugging a few electrical wires. The stock tail is in good shape, including the factory paint, and that makes it an ideal eBay listing. OEM pieces on this bike are getting hard to find so many parts taken off this bike will find their way to eBay.
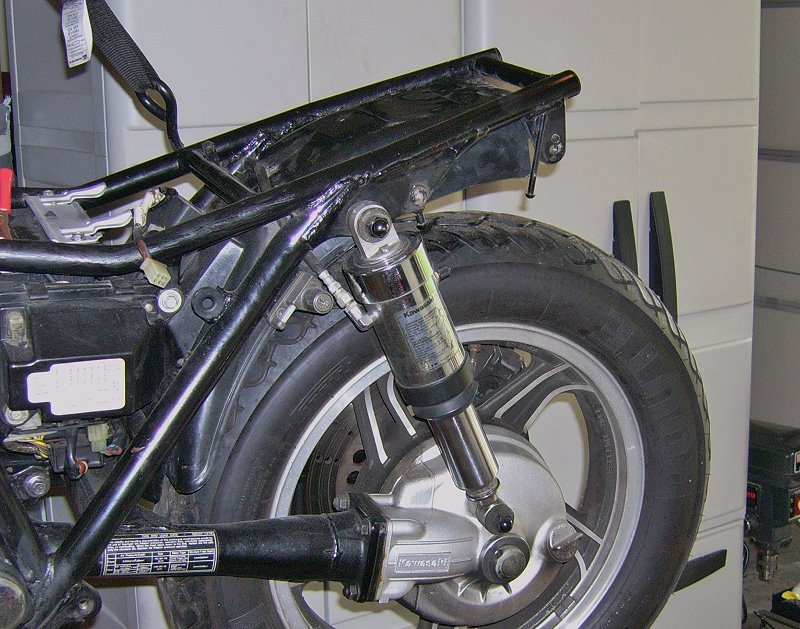
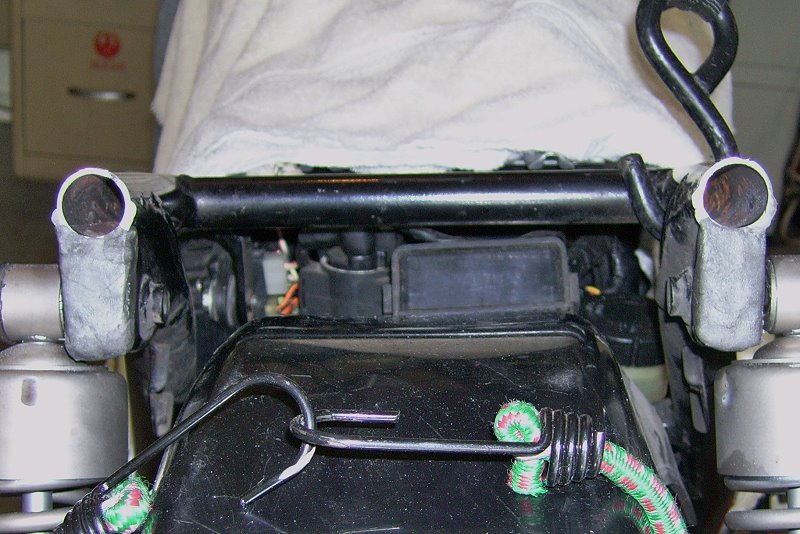
Step 2: Cut the frame
After deciding this bobber wasn’t going to be a hard tail (it really didn’t take much thought), I had to determine where to chop the frame. The attachment points for the shock absorbers are beefy at the upper frame. If it weren’t so well built in that area of the frame, the chop would need to be farther back on the frame to provide adequate support for the rider and the rear of the bike. To add strength to the ZN’s frame at the shocks, the fabricated bar from Step 4 (below) slides neatly into the upper frame tubes. The tightly fit double tubing was then welded together for added strength and stability.
Step 3: Cut the fender
The ZN’s fender isn’t a traditional painted metal fender. It’s the inner plastic fender on most other bikes. The good thing about that is that it makes customization easy.
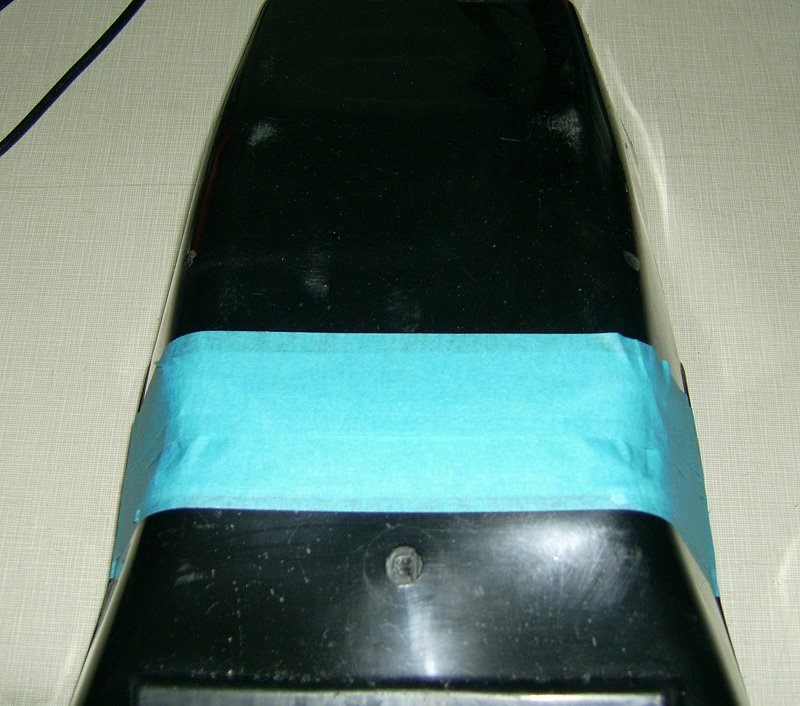
I put painter’s tape on the fender where the cut is to be made. If I were cutting a design, I’d draw the design on the painter’s tape and make the cut through the tape.
The cut’s made with a fine-tooth blade which can be bought for jigsaws and circular saws. A finishing blade makes the best cut in plastic.
When cutting with a circular saw it helps to put the blade on backwards. This cuts down on chipping and peeling. However, the big thing is to watch for melting plastic when cutting. Even fine toothed blades will heat up enough to melt plastic. At times, the backside of the cut will actually melt back together again. So, it’s important to go slow.

Since this is a first time cut for me, I experimented with a disregarded piece of fender to get my method down. This way I know how tough or how easy the plastic cuts before making the finishing cut. The Makita jigsaw that I recently acquired cut through the plastic fender like a hot knife through butter. To remove the left over burrs, a sharp knife and 400 grit sand paper made quick work of finishing off the final cut.
Note: If the cut was made on a painted surface with a jig saw, I’d perhaps cut from the underside. The reason is that if the teeth face upwards when cutting from the top/painted side, the teeth will lift the paint.
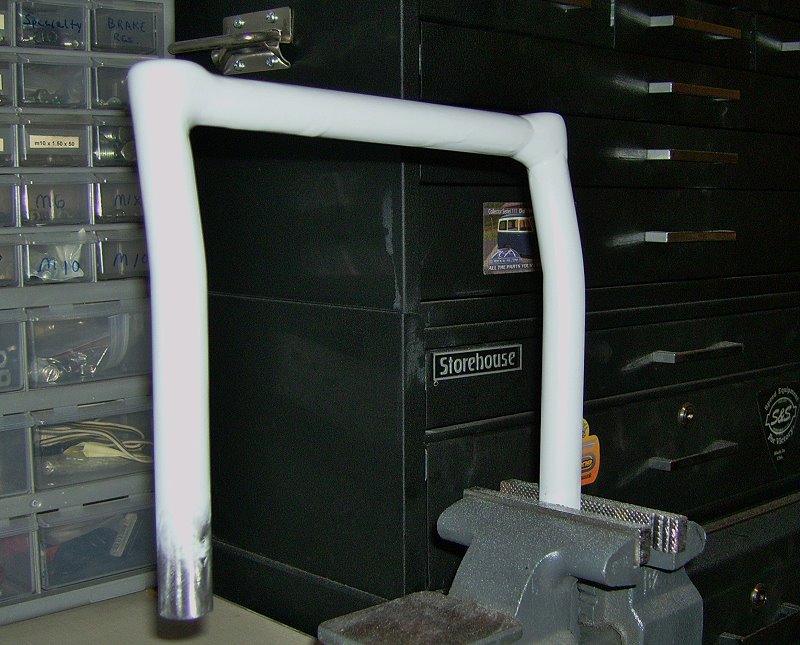
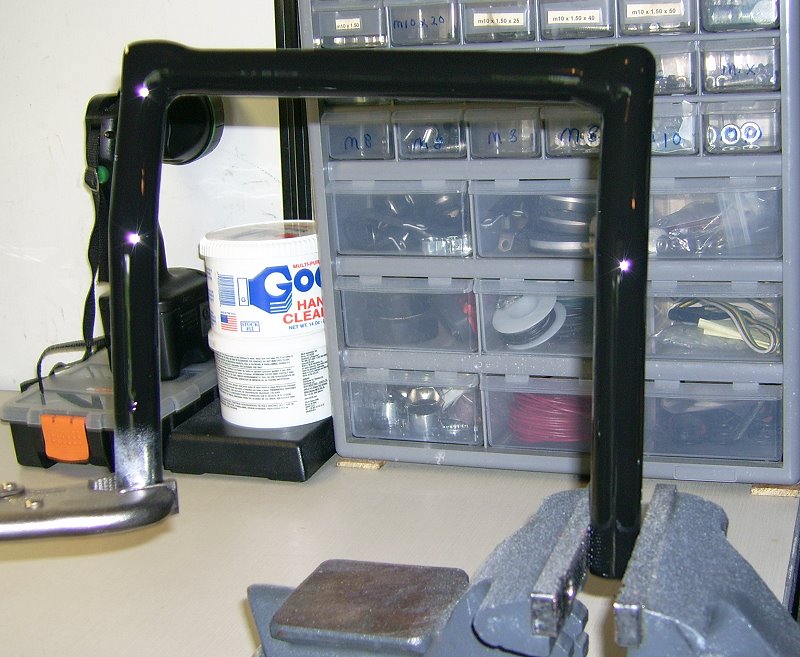
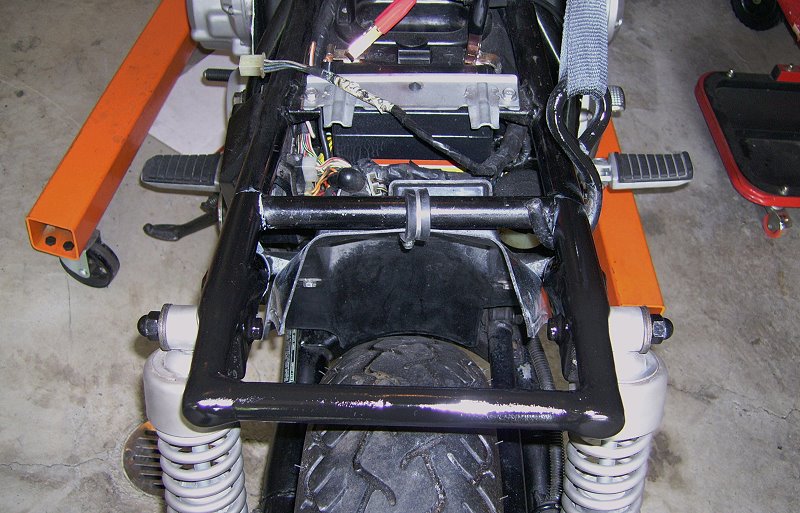
Step 4: Fabricate a new tail
To make the tail, I used a piece of the chopped frame and some scrap pipe that was laying about my shop. The scrap is 5/16” thick and, with a little persuasion, fit nicely into the top tube of the frame. The scrap is very sturdy pipe and provides extra strength to the bobbed tail section.
The scrap pieces were cut to fit my simple design. The chopped frame pieces provide the cross bar that’s welded between the two scraps. After the fitting and welding, the tail piece was cleaned up with a flap wheel on my angle grinder. The open ends of the scrap pieces were closed with J B Weld SteelStik Epoxy Putty. The putty cleans up the look of the tail and keeps water and debris from entering the frame tubes causing who knows what kind of havoc. Finally, the piece was shot with primer and gloss black spray paint.
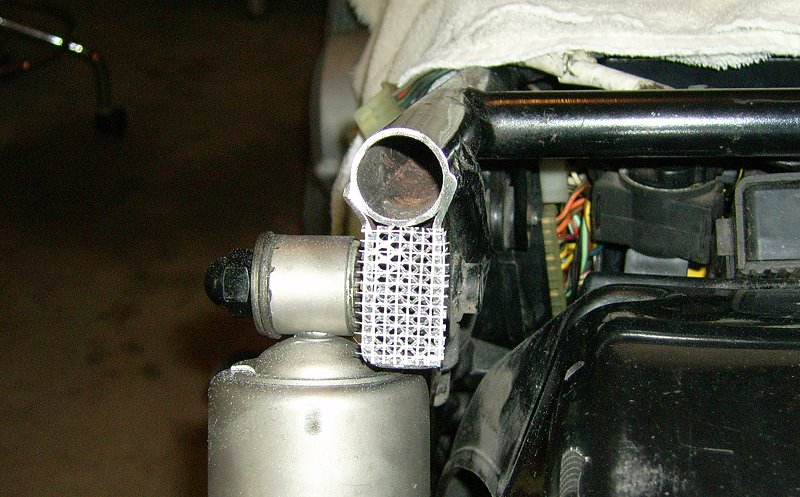
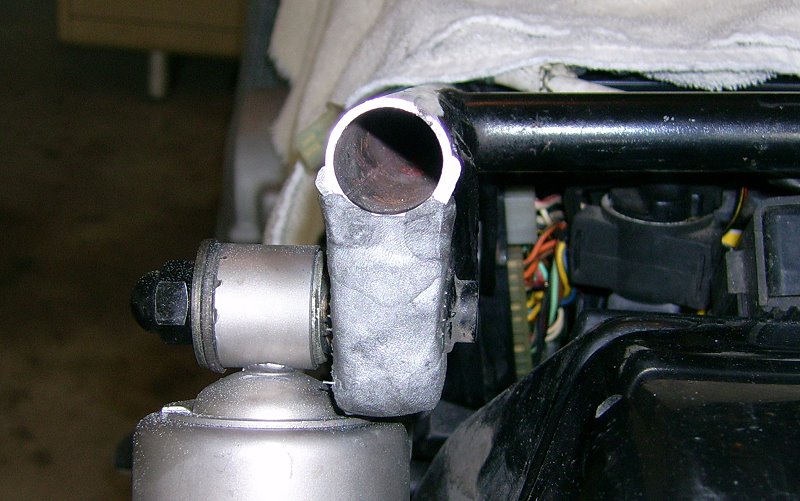
Step 5: Clean up the frame rails
The lower top rail is rectangular steel tubing and is the main support for the shocks. To close off the ends of the chopped frame, I applied J B Weld SteelStik again to pieces of Drywall Self-Adhesive Mesh cut to fit. After curing, the SteelStik was sanded and painted to match the frame.

Step 6: Electrics
The electrics at the rear—turn signals and brake light—haven’t found a home yet. Several places come to mind, like the frame rails or rear axle. The tail piece may also be a place for the electrics, although I’d like to keep the tail clean. As the build progresses, the electrics, both front and rear, will come together…and I’ll write about it in another post.
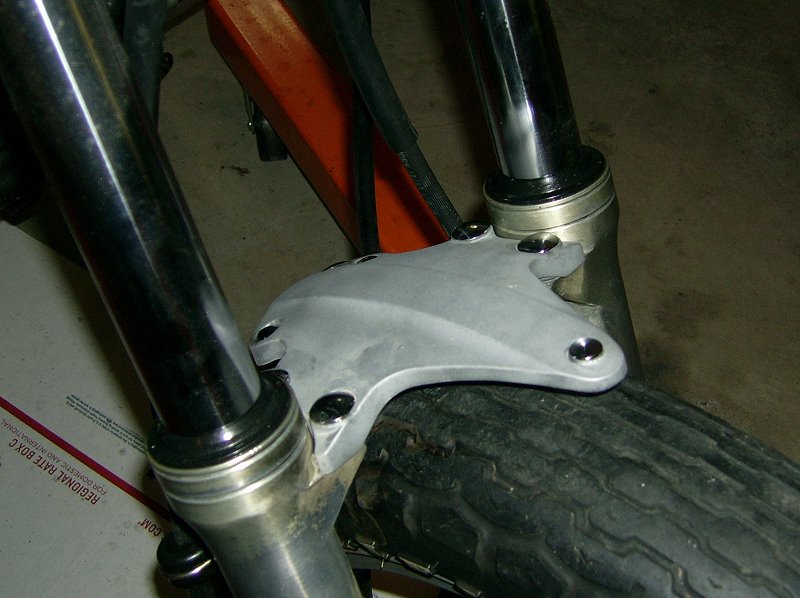
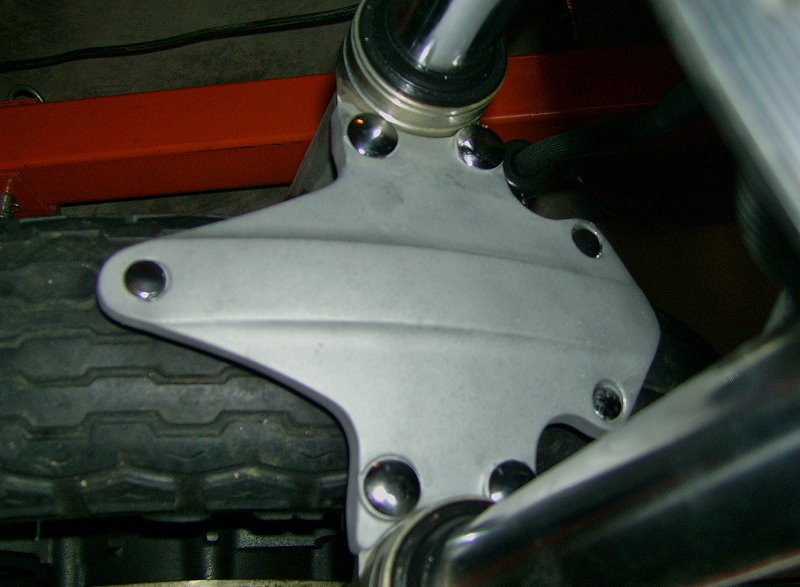
Finally: The front fender
Watching the paint dry on the tail section was too exciting, so I moved my self with my thoughts to the other end of the bike. The front fender was already going to be deep-sixed or sent to eBay. I planned on using the fender brace to make sure the fork sliders stay parallel added without flexing or bowing. Some builders remove the fork/fender brace because it looks cool. Who am I to argue about what looks cool? All I know is that this bike isn’t a lightweight and the brace will help reduce speed wobbles, fork flex and front tire wear. Who doesn’t like that? As a bonus, I think the brace itself looks cool. You know? It’s sort of tribal in shape and, after being blasted with walnut shells in my blasting cabinet, still retains a nice retro type finish.
What’s next? For now, I plan to soda blast the engine before installing the freshly painted exhaust system. The exhaust paint won’t cure until it’s been heated several times and I’d rather not accidently blast new paint off the exhaust, if I can help it. Then after the exhaust is hooked up, the bike goes to start up (finally)!
Next: Soda blasting on a budget