
It’s been little while since posting because the 850 has been receiving extra attention. By that, I mean it had its cases split.
First, the crankcase was wheeled to my extra large sandblasting cabinet (also known as the great outdoors or yard). From there it received a healthy dose of soda blasting, which did virtually nothing to the heavily oxidized and stained crankcase. I then turned to blasting it with walnut shells. Nothing to write home about. So, I broke out the crushed glass, which did alright. On the down side, it also slightly leaked through one corner of the tape and into the case. Not a lot got through, but there was enough to cause concern.
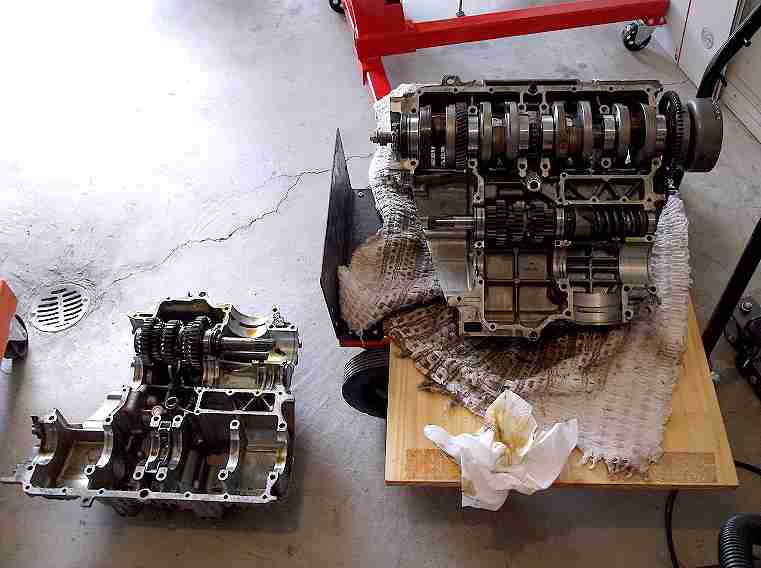
Concern led to researching the best way to flush out the crankcase. Research led to grave concern, and that led to splitting the crankcase, because there’s no other way to make sure no glass remnants were in there, even after flushing it out.
Here’s how I did it. First, I turned the pages of a Clymer manual for guidance about splitting the cases. While following the Clymer steps, there was a little voice in my head saying “this isn’t right.” Next, I listened to that little voice and determined that the Clymer manual was the pits, at least for this procedure.
The internet is great. A manual for just about any bike—even old vintage bikes from the 80s and maybe even older—can be found online and for free. The GSResources, a website devoted to the Suzuki GS bikes, led the way to here, which had the Service Manual and more. The previous owner of the 850, Mike, gave me a hard copy of the OEM Manual that’s virtually untouched, still wrapped in the original plastic covering. It doesn’t see the garage and lives on the book shelf.
After the crankcase was split, it got sprayed with a mix of water and Dawn Dish Soap. Lots of soap was used to suspend the dirt, break down the grease, and make it all slippery for removal. The crankcase soaked for about an hour. Then, the insides were rinsed out with my pressure washer and blown dry. To stop flash rust (or any kind of rust), it received a dose of WD-40.
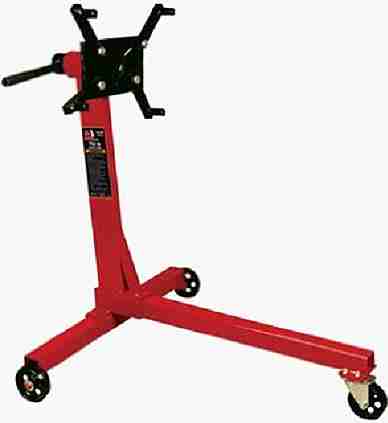
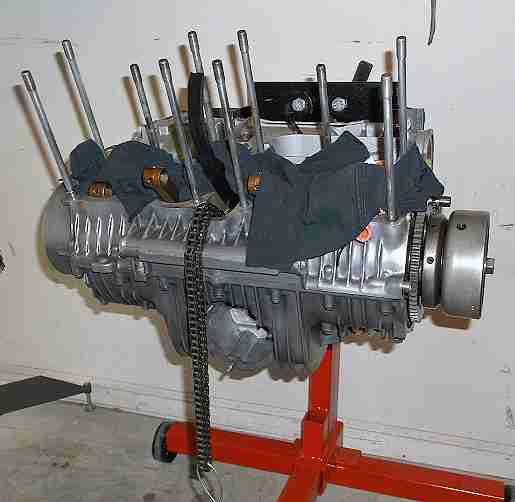
This is where the real fun began. Wrestling the four-cylinder engine about a foot off the garage floor did not sound attractive from the very beginning. There’s got to be a better way. So, enter Harbor Freight and their inexpensive engine stand (below, left).
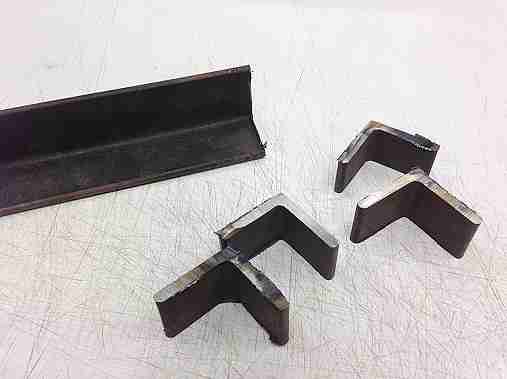
A universal automotive engine stand isn’t made for motorcycle engines, obviously. However, with a little ingenuity, it can be made to work. In this case (no pun intended), four brackets made from angle iron would do the trick (below, right). My brain isn’t wired from birth to think in three ,so it took a few attempts to get everything to align and fit just right.
The engine stand is awesome…shout out to my wife, Maria! No more bending, turning and twisting to get at the motor’s parts, nooks and crannies. No more neck ache, back ache and shoulder ache…alright, that’s an exaggeration. Anyhow once hung on the stand, cleaning the motor (yes, again…there’s a pattern here) is a whole lot easier.
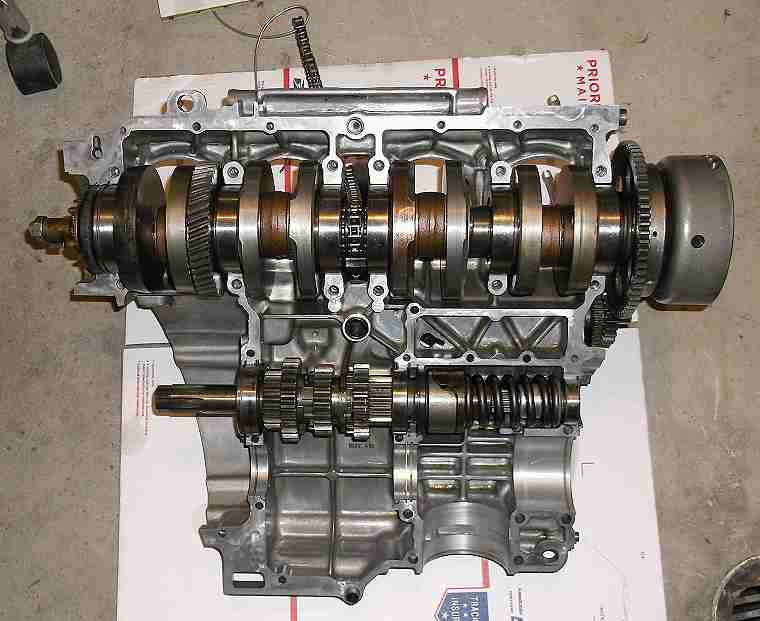
The motor was next cleaned and buffed with Super Fine Steel Wool and Marvel Mystery Oil.
The original plan didn’t call for splitting the crankcase. But in the long run, it was a good thing. All the 30-year-old dirt and sludge was cleaned away, which is good peace of mind.
Next, it’s motor reassembly—at least to some extent—and then on to the ZN.
Next: Finishing the ZN (1 of …)