
We’ve all had that feeling. The feeling that something bad is about to happen, and in that split second, it does. After the mini-shock and realization of what just happened hits the brain, there’s generally a string of expletives that don’t include the word “oops.” A few minutes later, there may be a litany of “stupid.”
The endeavor doesn’t matter—taking an exam, pursuing a career, working on a relationship, fixing a bike, whatever. That feeling is common to everything that I’ve tried with a commitment.
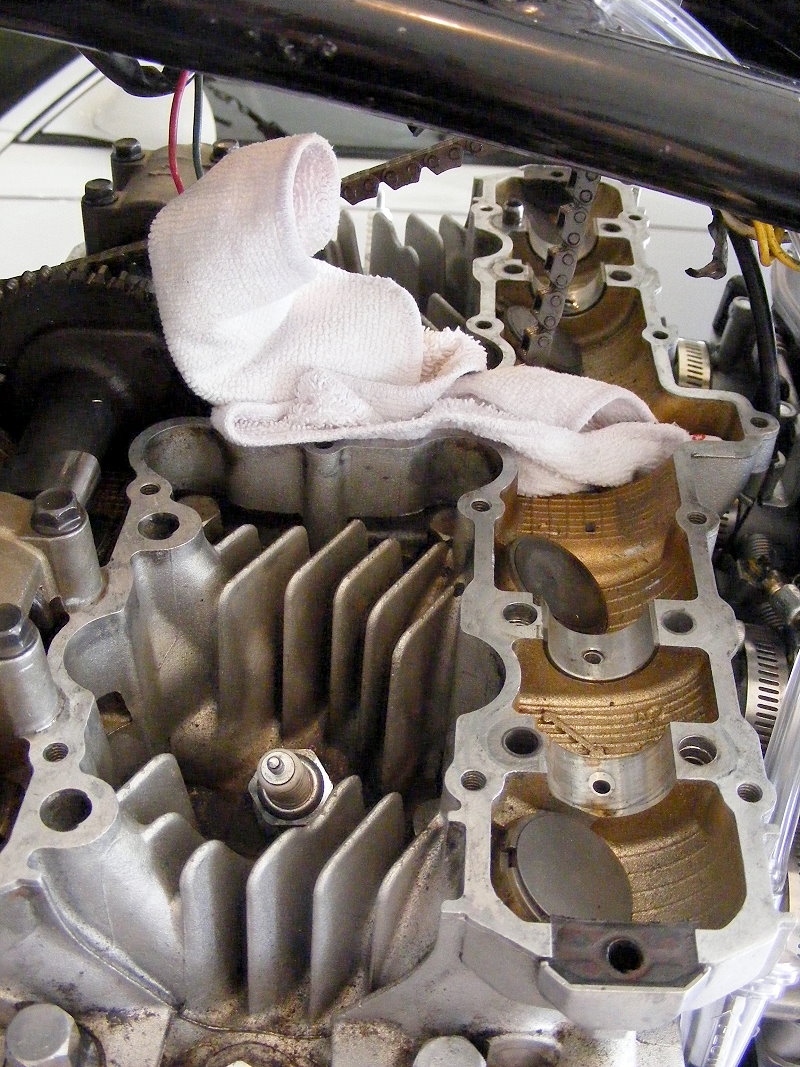
The comedy of errors started with inspecting the valve clearance on the intake valve of #2 cylinder. It went like this. While the shim was releasing from the bucket, the holder let loose and twisted sideways, causing the camshaft to pinch down on the shim. No matter how I tried to ‘cheat’ it out, it wouldn’t budge. My confidante in all things mechanical (a.k.a. my wife) suggested removing the cam, which made perfect sense, of course.
After loosening the cam caps, the old shim was free. Since this was no big deal, putting things back together will be quick and easy.
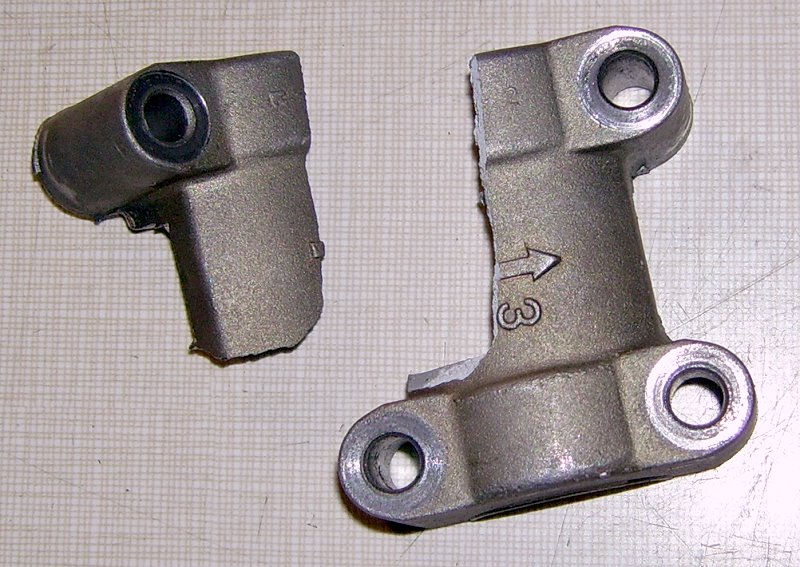
Well, as the cam caps were closing down, the intake cap marked #3 (over #2 cylinder) split down the center and broke. Who knows the reason? It could have been user error when bolting it back into the head. It could have previously been over-torqued (the listed spec is 12 ft/lbs and that’s too much). It could have been a manufacturing defect that reared its ugly head. It could have been previously replaced with an inferior/wrong part. I’ll never know, but it sucked nonetheless.
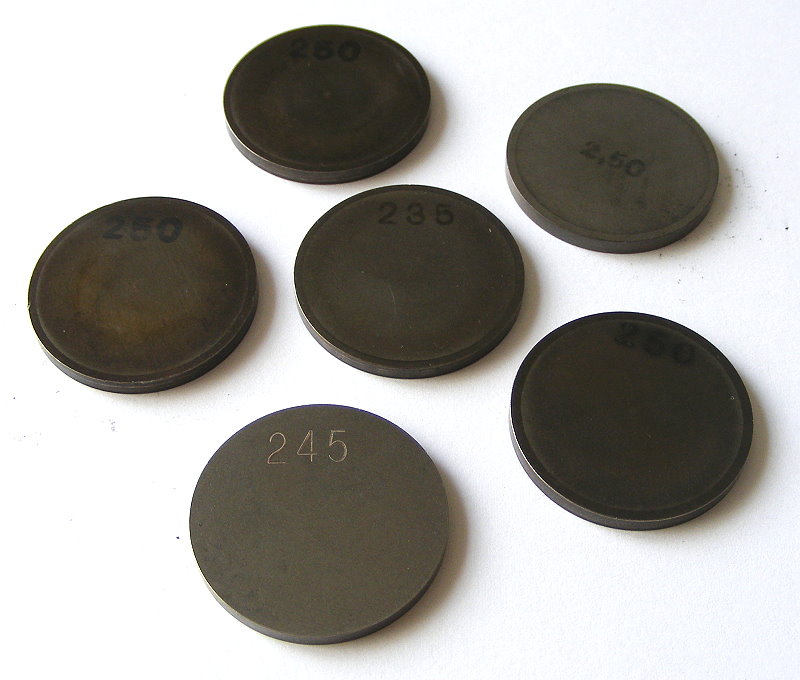
To make a long story short, I was able to acquire (used) replacement parts with some amount of luck and things were looking up. With everything in hand, I set about putting things back together again. First, re-replace the old shim…I don’t know why I put the old shim back in the first place. Maybe it was to remind me that #2 intake was a problem child. Yeah, like I needed reminding.
With the exhaust cam sitting on the bench, swapping the shims would be the simplest of things. I picked up the shim and oops. See paragraph 1 above.
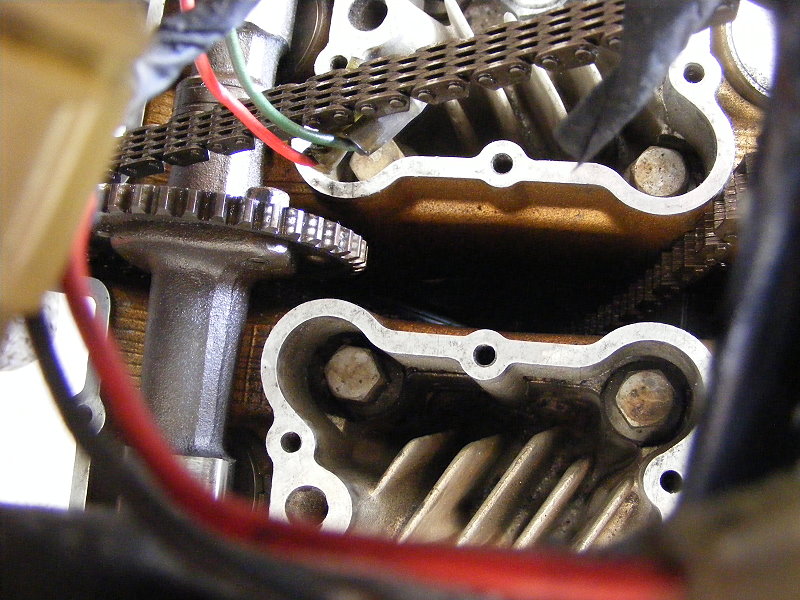
The thing had a light coating of oil. It slipped out of my fingers and, without any hesitation, dropped into the Valley of the Cam Chain between cylinders 2 and 3. The comedy of errors just continued.
The Valley is deep, dark and narrow. It is oily and doesn’t easily give up those that are so ‘stupid’ as to enter. Seriously, it’s hard to see into the Valley from the top no matter what angle I took. The frame has a backbone with three tubes. (Not the best for bobbing but, at the time, bobbing wasn’t on my mind). What I needed was to position a small light and my eyes between the tubes so I could look for the shim. I also needed to calm down. I’ll fix it. Wait, there it is!
Nope, just my old eyes playing tricks on me.
So, the next step is to drop the oil pan and hope the shim fell through into the old oil. With the bike now hanging from the engine hoist, it’s first a matter of draining the oil and removing the oil filter. An oil change was scheduled anyway so it’ll just happen sooner than later. No big deal.
The drain plug came out nicely. The oil filter…huh? It hung up on the exhaust hardware. Should it really be like that? I don’t think so. It must be twisted out of shape or something but it now needs to come off to remove the filter. So, off with the exhaust, which was another scheduled thing that will happen sooner than later. Again, no big deal. Well, this is peculiar. The system appears to be one piece from the head to the tail, which will make things interesting when it comes time to work on the exhaust.

Finally, take off the oil pan and hope to find the shim. The oil pan was suctioned on hard. All the screws were removed and I checked it four times. It just didn’t want to let go. Beating it with a rubber mallet did nothing. Beating it with a heavier rubber mallet also did nothing.
After searching the house for a very thin flexible putty knife, two of them appeared from my wife’s tool stash somewhere. Using the thinner of the two, I lightly tapped and worked it into the front of the oil pan. Once in, I lightly tapped the other putty knife into the open space and worked them both around a small section of the pan to release the suction between the pan and engine block. The rubber mallet then did the rest. There was no prying involved in the removing of the oil pan. The mating surfaces stayed pristine.
It’s expected that the oil pan will have sludge but this pan was loaded with it. Too bad that I didn’t remember to snap a pic of the mess. I was on a missing-shim mission and it wasn’t in the sludge.
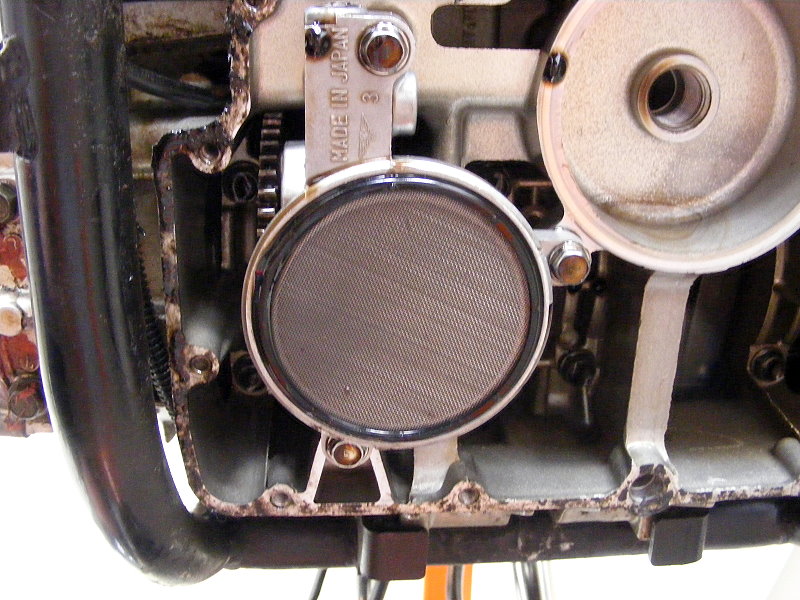
After the dirty oil dripped from the motor, I looked up inside the motor beyond the oil pump. There it was! It didn’t look like it was wedged tightly or anything. It was just sitting there, ripe for the picking and so it was.
Lesson Learned: Actually, it’s a lesson known but ignored. Stuff a rag or something in the Valley or other space(s) where small parts can be ‘lost’ from easy retrieval. If someone spends any amount of time working on motors, these things will happen—a little screw down a carburetor throat, a washer down a cylinder or whatever. Stay calm. It can and will be fixed.
The oil pan and exhaust are off for now. The exhaust will need cutting, repairing, welding and re-fitting. Sounds like at least one post to me. The oil pan will simply need a new gasket and bolting it together. A new gasket can be touchy so, when I put the valve cover back onto the head, I’ll write a post about my process.
For now, the bike needs the camshafts re-installed and timed to the crankshaft. The specifics of how that works depends on the make/model of the bike. The best tool to time the cams is a Repair or Service Manual. I picked up a Clymer Repair Manual for Kawasaki KZ, ZX & ZN 1000-1100cc 81-02 from Amazon. The Manual gave me all the information that I needed like aligning the timing marks on the camshafts with the crank and the number of cam chain links between intake and exhaust. It’s not a difficult project but it needs a Manual (or the info from a Manual).
With the valve train buttoned up, all I need to do is re-install the carbs. Oh joy! They were removed for access to the cam chain tensioner when doing the cams. Really…I hope the comedy surrounding cylinder #2 is over and I can move onto to other things (or comedies…or whatever). It’s all good.
Next: Replacing gaskets and fixing oil leaks