
As the bike is getting closer to actually starting and moving, it seemed like an ideal time to finish the brakes with brake lines. So, on went the brake lines, along with a dose of angst about bleeding dry lines on early Japanese bikes with double pumpers up front, along with a line out back that looks more like a roller coaster at Dorney Park than a brake line.
After installing the lines, I attempted to bleed the rear lines. Start easy and work my way forward. Yeah, right…
The calipers and master cylinders—pistons, seals, bleeder valves, springs, everything—were rebuilt. I tried my tried-and-true reverse bleed method, the traditional bleed methods, vacuum method, and gravity overnight. Nothing. The system would build zero pressure. When I reverse-bleed the brakes, the system pushes fluid from the calipers to the master with no problem. No air bubbles. Clean, solid fluid comes up into the master but no pressure.
It was apparent something wasn’t right, because neither the rear nor the front wanted to bleed. The path was obvious. The master cylinders needed another look. Off they came. Taken apart and put back together. Then, repeat the drill again…and again. I finally realized that the piston seal was on backwards.
The correct way.
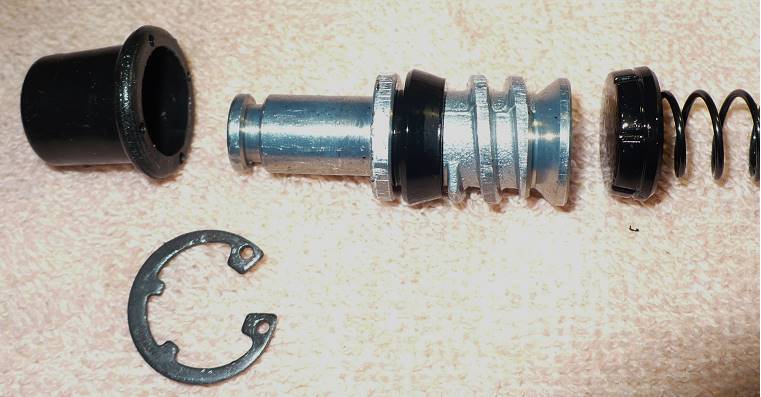
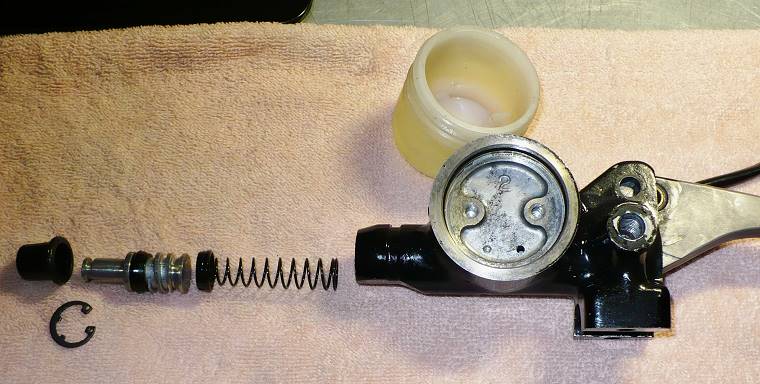 It is sort of cone-shaped. The larger side needs to face the calipers. That way, when the brakes are pressurized, the pressure pushes harder against the seal. If backwards, it seals well enough to push fluid through an open bleeder, but when you apply the brakes, it just squeezes the edges of the rubber a bit and lets fluid pass, i.e., no pressure.
A closer look.
Right now, I’m waiting for a brake-light contact that resides in the front brake handle. In my stupid frustration, I snapped the contact when carefully (LOL!) removing the brake lever from the mount. I’m also waiting for a new snap ring. The original bent during the last tear down…those things are a pain to remove when sunk down into the housing.
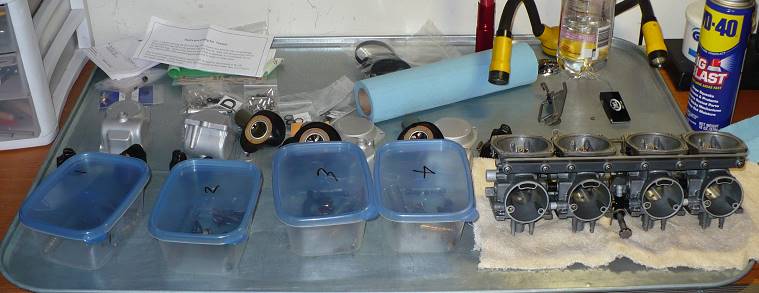
I gladly put the brakes away for a week and moved onto painting the tank, the instrument gauges and the carburetors…
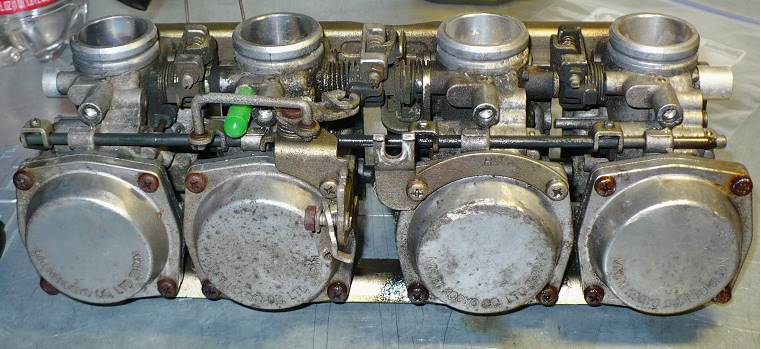
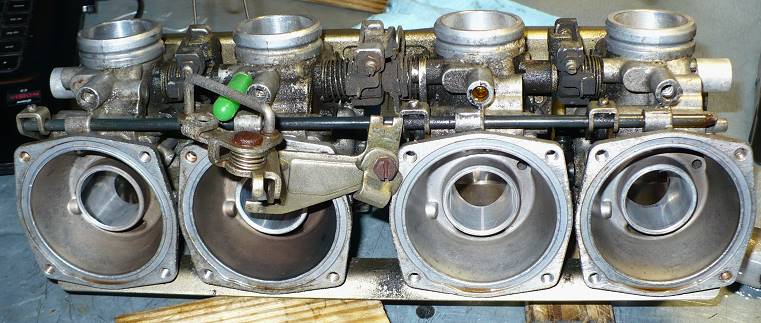
The outside looks as expected.
The interior was a surprisingly clean. No evidence of hard varnish on surfaces, no clogged ports or ruined jets. The soft rubber seals and o-rings were no longer serviceable, but that’s expected after how many decades.
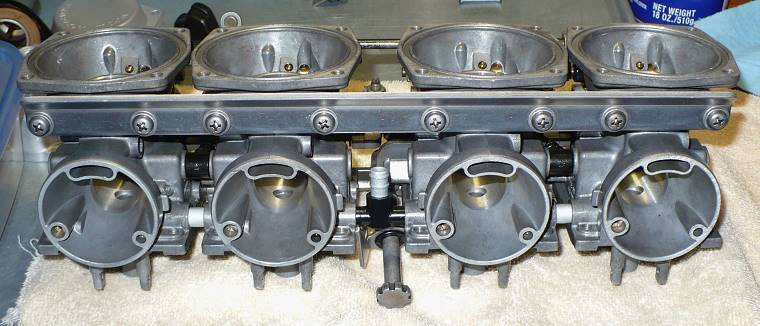
The carbs received a bath in Pine Sol that lasted a couple of days, followed by a blasting with Sodium Bicarbonate. They turned out pretty good for nearly 40-year-old carbs.
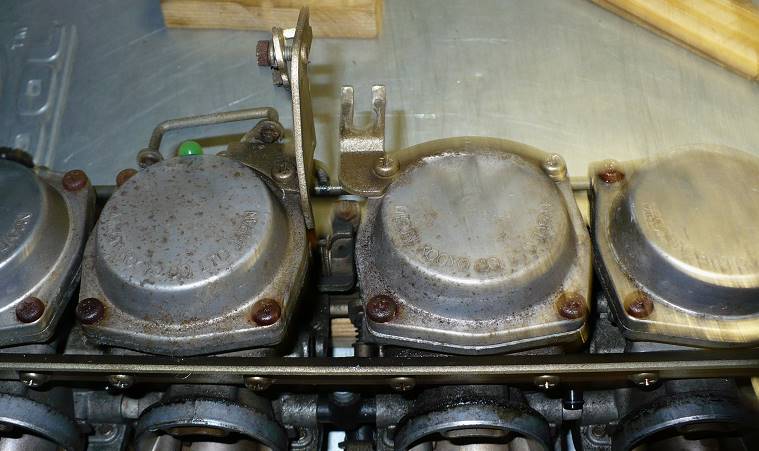
The only bad time that I had was removing an idle mixture screw on carburetor #4 that did not want to budge.
I tried everything numerous times—soaking it in PB Blaster, heating it, tapping it, freezing it, grinding a screwdriver for a custom fit, whatever. Nothing worked. I had reservations about drilling, but there were no other options except maybe a machine shop.
So…I got the drill and put the carbs in the bench vise. The plan was to use an EZ Out. After getting a small starter hole going, I stepped up in bit size. It needs to be 60-70% of the screw. If the EZ Out is too small it will likely snap off inside the hole. Not good. Patience, taking my time and the correct bit size pierced the screw with the threads intact. Great! Grab the EZ Out and…nothing. The screw will not turn.
Out comes the left hand drill bit which only made the hole a bit bigger (which was making me a wee bit nervous). Out of options until I remembered a guy on the internet had the same problem and used a torx bit.
I hammered the torx into the screw. Turned it and the screw moved slightly then spun without grabbing the screw. Ugh! I banged it hard into place and tried again. It started to turn but not easily. So back and forth it went—move it a little counter-clockwise, then clockwise, then counter-clockwise, then clockwise—until it gave up.
The torx bit method worked and was my last best option. I’m glad that I was able to do the repair on my own, without resorting to a machine shop. But, I’d rather not have to do it again any time soon.
Tomorrow, finish the carbs when the new mixture screw arrives and back to painting.
Next: Paint