
I’ve never built a saddle. I’ve never even shaped the foam or covered the foam. I’ve never made, cut or bent a saddle pan. My experience with saddles has been sitting on them and searching the internet for a Mustang saddle that would fit whatever bike I owned at the time.
With the ZNs stock saddle sold on eBay, the bobber ZN needed a respectable saddle. Of course, Mustang doesn’t carry one and so the saddle maker hidden within needed to emerge. Right.
I found this excellent handbook on saddle making while searching for my hidden saddle maker. The handbook is free and covers all aspects of how to put together a saddle.
What follows is a condensed version of the handbook that’s been modified to show how I made my saddle for the ZN.
The template
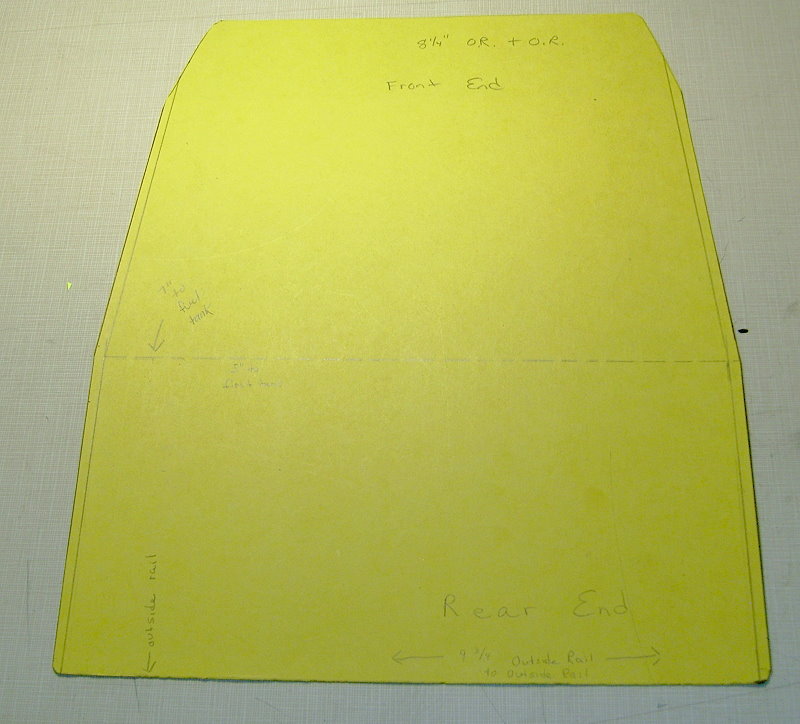 The first thing to do is to create a blank template. In other words, get some poster board that will fit the size of the intended saddle. Draw a line down the center of the blank template. Make corresponding center line marks on the frame and fender so as to align the blank template with the frame.
Lay the blank template on the frame rails. Use a piece of tubing as a weight to help the poster board hold a shape along the bends and curves.
Using a felt tipped pen, trace the outline of the frame rails from the underside of the blank template. Try to keep the pen perfectly perpendicular to the rails. It helps to keep the blank template flat by placing a stiff piece of thick cardboard or thin plywood on the top side when tracing from below.
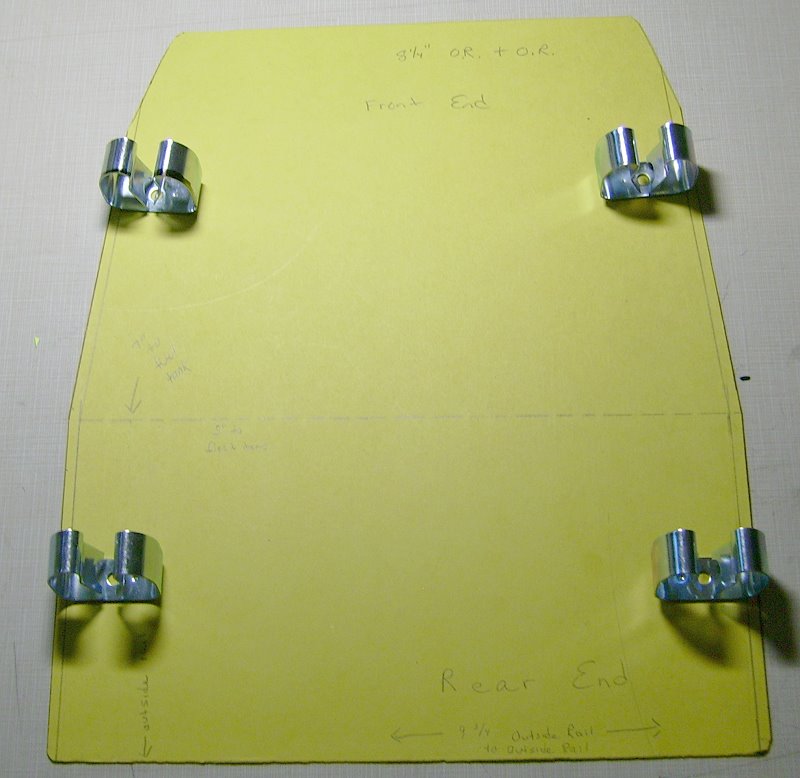
Now, using this new pattern template, cut away all of the extra material and get it down to something that can be refined. Next, chop the pattern template down to follow where it will sit on the frame rails for support and to blend into whatever contours there are. Make sure the pattern template accounts for placement of mounting hardware.
To radius the end points and corners, use whatever objects are nearby in the shop—paint cans, oil cans, coffee cups and almost anything round can be used as curve templates. It’s easier to make an upholstery cover lay smooth if it follows long gentle curves instead of sharp bends.
Once the pattern is finalized, it’s time to lay down the lines on the actual piece of steel to be used for the saddle pan. Keep in mind that the pan edging and final leather/vinyl cover will add about an extra eighth of an inch all around to the overall dimensions of the saddle.
The pan
To transfer the pattern onto the steel, start by setting one edge of the steel sheet as a control line and then draw a centerline and an opposite control line. Place the pattern on the steel sheet and trace the outline with a felt pen.
I’m using 16 gauge steel on this bike which normally may be thin for a saddle pan. However, the pan will be entirely supported—front, back and sides – by the frame. If the frame and saddle were configured differently, then I’d use 14 or 12 gauge steel.
Cut out the pan using any method that cuts steel without warping it. For me, a jigsaw with a fine tooth blade works very well. The use of a cutting oil helps as does taking it nice and slow allowing the blade to do the work.
When finished cutting out the pan, it’s time to fair in the little inconsistencies found along the perimeter of the cut. The best way to spot the hills and valleys is to tip the pan on its edge and slowly rotate it around to sight down the sharp edges.
Mark the bad spots with a felt pen and use a belt sander to blend and fair the perimeter until it is a smooth flowing line from start to finish.
At the same time, it’s a good idea to dull the raw edge by rounding it over with the sander or file until smooth.
Next, it’s time to draw a control line around the perimeter for the spike strips that will hold the cover to the saddle. There are several sellers on eBay and the internet offering spike or tack strips for sale. A quick and easy way to draw a control line consists of using a small piece of one-inch steel bar or yard stick as a guide. Then just eyeball the areas where the curves occur.
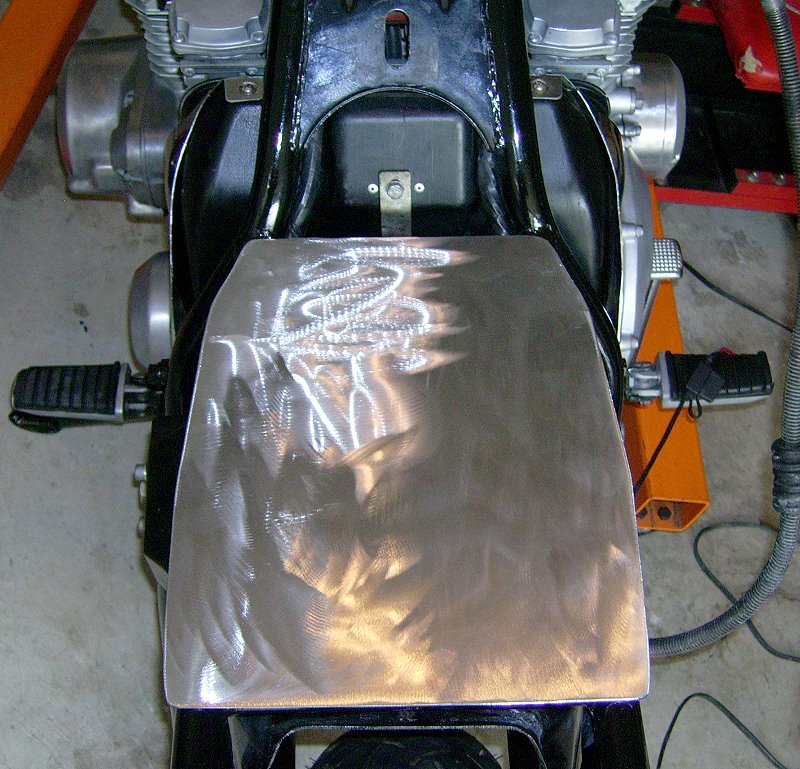
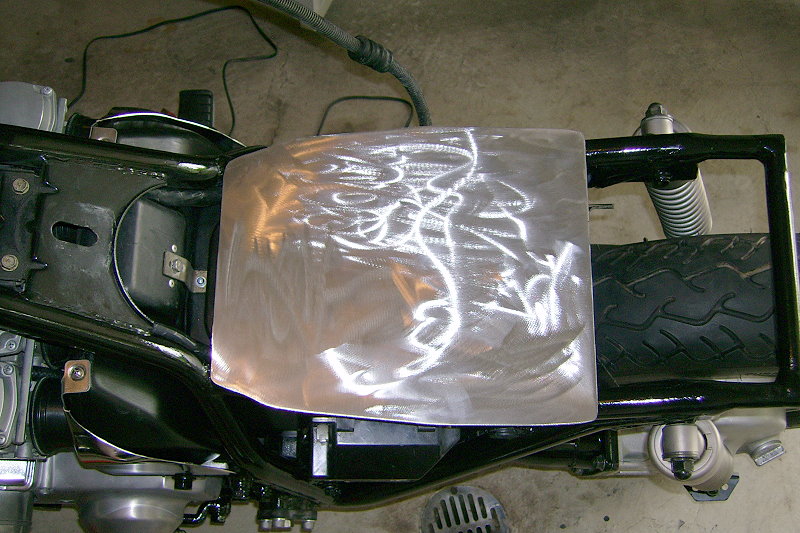
Take a moment to scribe the centerline in place on both sides of the pan before bending it into shape. Bend it into shape using a knee or hammer and vise. Once it’s bent and in primer, it’ll be tough to figure out the center when attaching hardware.
As the trial bends and fitting takes shape, areas that need to fair down a little more for a smooth line start to appear. After the pan is shaped, the contours may be significantly different from what‘s expected when working with a flat pattern.
That ends part 1 of a tour through first-time saddle making. Part 2 will soon follow to focus on the mounts and the foam.
Next: Making a simple seat pan