
Things on the ZN were picking up speed. Things were coming together and falling into place. The bike’s beginning to take shape and looking good in my mind’s eye.
I can’t say how many hours I’ve spent in front of this computer researching. Time has been spent looking for OEM parts, aftermarket parts, the best prices on parts, how-to-do this, how-to-do that, and so on. For most questions, I knew enough so I could sort the helpful answers from the not-so-helpful answers.
One question had me guessing, however, from the very beginning. I didn’t have enough know-how to get started and work my way through it. My research didn’t help much either. I usually walked away scratching my head and wondering why the answers weren’t easy to find. The question has to do with attaching the saddle to the motorcycle.
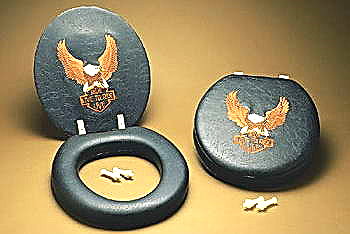 Now, I ran across a lot of people asking the same question, so I’m not alone in my state of perplexity. If the question involved a Harley, then the answer was forthcoming. Aftermarket companies build everything from chrome nuts to toilet seats for the venerated Harley. That means there are definite methods for attaching a saddle to a bobber, chopper or whatever.
If you are outside of the H-D box, then answers become more and more remote as the age of the bike increases. Unless, of course, the build involves one of the more popular bikes—Yamaha XS, Honda Shadows or Suzuki—to bob. There are not too many shaftie bobbers in the world. At least not enough for aftermarket companies to spend resources on bobber parts. And, I’m fine with that.
One ‘answer’ that came up from time to time was this: there are a dozen ways to attach the saddle. End of story. Not really an answer, right?
Gary Weishaupt who wrote this saddle-making handbook offered up a few ways, even though he’s working with Harleys. Still, it’s an excellent handbook and I originally used one of the methods that he mentions—spring clips.
Spring clips are actually a pretty creative way to do a custom job of attaching the saddle. I like a couple of things about it. It’s an easy on, easy off solution. The hardware is relatively inexpensive and easy to find. For these reasons, this is how I wanted to attach the saddle to the ZN.
After I mocked it up, I wasn’t digging the spring clips for this application. The thing I didn’t like was that the clips hold the saddle up off the frame rails. The saddle doesn’t lay on the rails which is what I wanted for the ZN. Since the pan is short and very boxy with no taper in the front or the back, it wouldn’t look right to me.
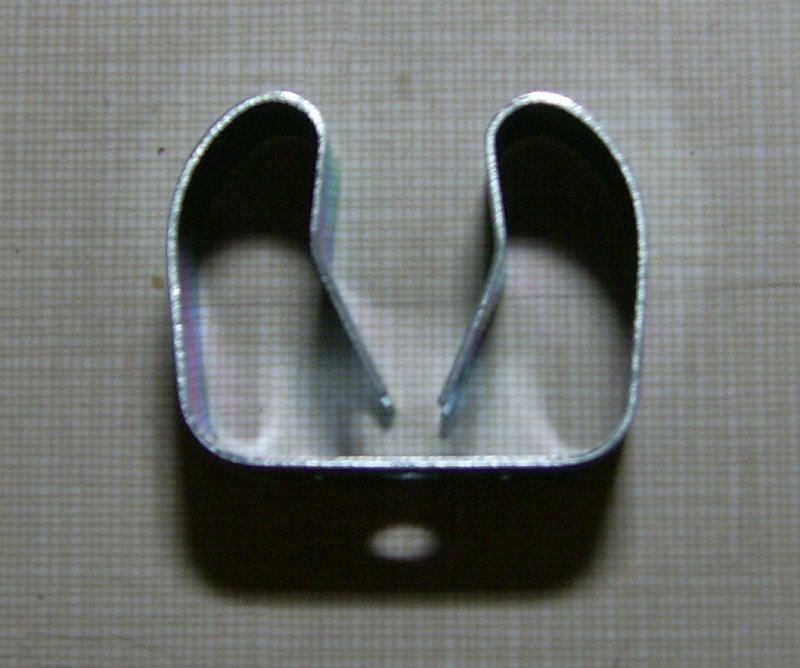 The picture of the clip clearly shows what I’m referencing. Maybe I should have seen that since I wanted the saddle to be on the rails…maybe not. It makes no difference at this point. Time to move on and find another way to attach the saddle.
So, it’s back to researching. Oh wait, I’ve already spent too many hours rummaging around the internet and to no avail. Now it’s time to think it through on my own. Here’s what I’ve come up with.
Option 1: At first glance, these Bimini Curtain Spacers look like they might do the trick. But, they present the same problem as the spring clip. Although the frame rail sits into the spacer, the spacer still holds the saddle up off the frame rail. So that’s a no-go for this application but the spacers may come in handy for another application.
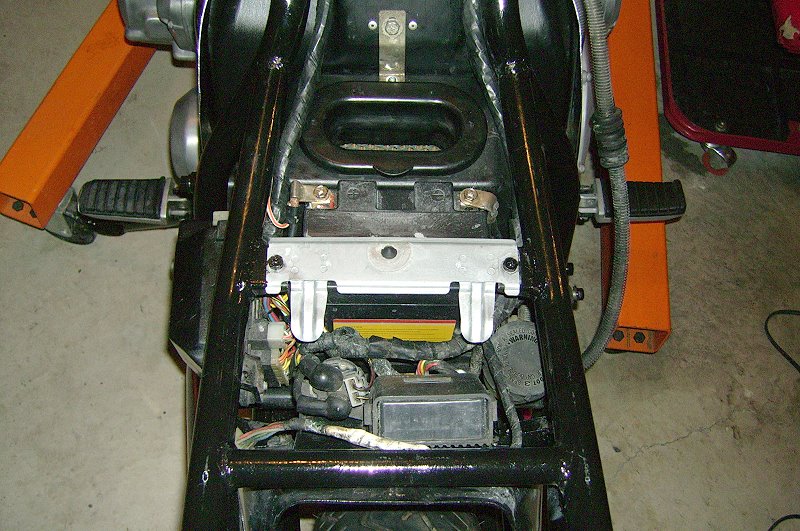
Option 2: Weld a nut on foam side of the saddle pan at the tail. Drill through the rear frame bar and saddle pan. A bolt will go through the bar and pan then threaded it into the nut to hold the rear of the saddle in place.
On each side at the front of the pan, attach a U-bracket turned on its side so the opening of the U faces outwards towards the frame rails. The U-brackets basically surround the rail at the top, the inside and the bottom. Brackets can be made from squared steel tubing that cut in half. To install the pan, drop the narrowest section between the rails and slide it forward until the U brackets surround the frame rail, holding the saddle in place at the front. Now, install the bolt at the rear.
Option 3: Cut a squared steel tube in half to make two U-brackets. Attach the brackets to each side of the saddle pan with the opening of the U facing downward. Now, drill through the bracket and the frame rail and insert a bolt thru the bracket and the frame rail. As alternative, make the bracket longer and don’t drill through the frame rail. Insert the bolt just below the frame rail.
Note: Instead of screwing around cutting steel tubing, these U-Brackets may be worth a look.
Option 4: Install industrial-strength Velcro at strategic points. This stuff works well and can support a lot of weight. I have no problem using this to hold down a saddle. Actually, this option is on deck so if my go-to option doesn’t work out, then this is next up.
Option 5: I found this solution on the internet. It’s not for me and it’s not for this application but it’s information that may come in handy some where, some time.
Option 6: Drill and tap the inside frame rail for a small hinge. Screw the other side of the hinge to the bottom face of the saddle pan.
Option 7: My search for clips, clamps, pins, hinges and all things hardware, I ran across Snap Clamps. They are simple little plastic devices mainly used with PVC pipe to “attach tarps, shade cloth or netting to pipe.” The clamps are manufactured in several sizes and strengths. This video shows what they do and how they do it. I wasn’t sold on using Snap Clamps until I saw the video. It steered me away from the thought of getting the heavy duty clamp with an aluminum cap which now looks almost like a permanent solution.
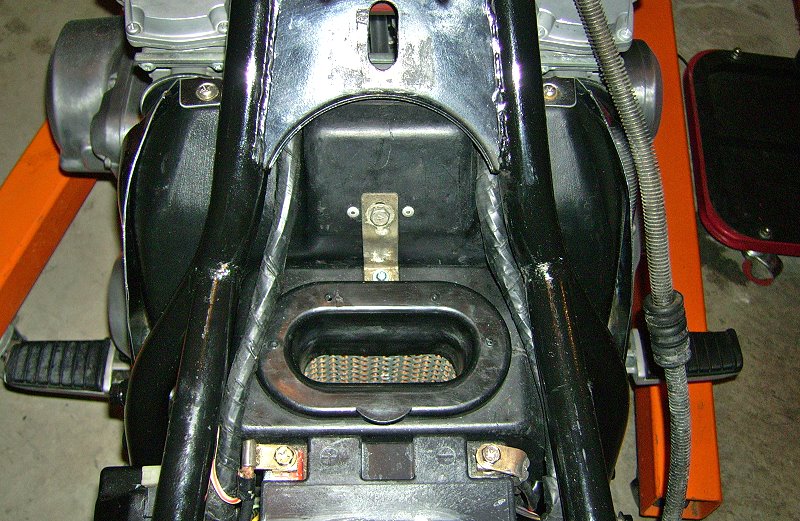
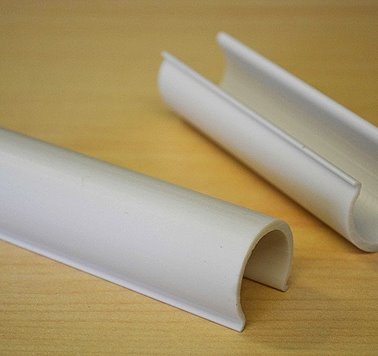 The plan is to attach the saddle with a Snap Clamp Light or EZ which is pop riveted to the saddle pan at the back. The Clamp snaps over the rear bar which may allow the saddle pan to rotate up and down for easy access to components beneath the saddle. If the saddle slides side to side, then some small angle iron brackets can be welded, riveted or screwed to the inside of the frame rail for stability or a couple pieces of Velcro will work too.
That’s the extent of my creativity for one night. It sure would have been helpful if Kawasaki bolted the rear of the fuel tank to the frame. Having that bolt as a fastening point would have opened up many other options. Oh well, maybe next time.
Update and important note: The Snap Clamp sizes can be confusing. My frame rails are exactly 1” so I purchased a bag of 1” Snap Clamps. They arrived and were too big for the 1″ rails and the 7/8” rear bar. The bag says to purchase 3/4″ Snap Clamps to fit a 1” bar. What?? That’s right…buy 3/4″ clamps to fit a 1″ side rail.
I returned the 1″ clamps and purchased 3/4″ and 1/2″ clamps which fit perfectly. Unbelievable.
The plan is to attach a Snap Clamp at the rear. The 3/4″ clamp has just enough give on the 7/8″ bar to allow the saddle to flip up at the back. That will be very handy. To keep it in place at the front and sides, a few strategically placed pieces of industrial-strength Velcro will do the job.
I’m afraid using three Snap Clamps (two on the sides and one at the rear) is overkill. Prying the saddle off the rails will probably lead to something breaking after a few go-rounds. The clamps do hold things in place nice and tight.
And if I put clamps on the side, then the clamps will show and make everything look sort of hacked. By using just one at the back which is fully hidden under the saddle, it makes for a cleaner look.
Alright then…it’s back to square one and build the saddle now that all the pieces fit together, as far as I can tell.
Next: A mishmosh