
A good bit of basic or necessary work on the ZN is complete. There’s more to do but we’re closing in, slowly but surely, on fun stuff. For instance, the exhaust is ready to be constructed. Since this can be fun, I’ll probably write too much. In other words, this topic may stretch into two or more posts.
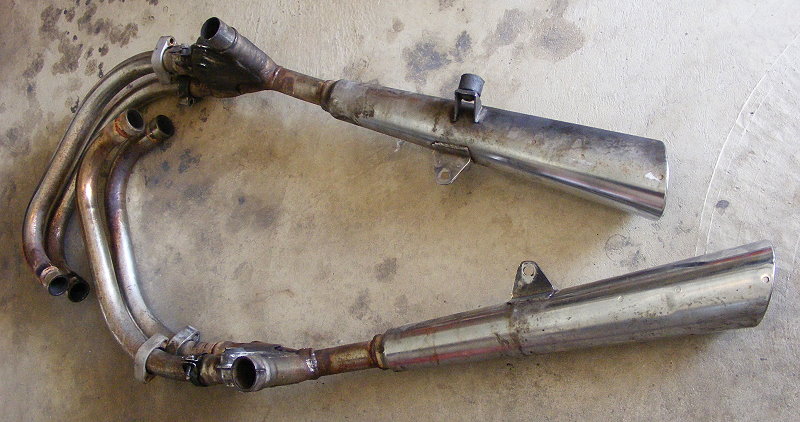
The first thing to do is remove the old exhaust. I never owned a bike with a system like this. There are four header pipes funneling into two collectors, one on each side of the bike. The header pipes for cylinders 1 and 2 collect on the left side with cylinders 3 and 4 collecting on the right side. Each collector leads into a muffler. This configuration is called a 4-into-2 system.
The strange thing, to me, is that each side of the system is one piece from the header to the tail, except for a removable head pipe on each side—header pipes 2 and 3. The cross-over also has a removable pipe. Here’s the thing, header pipe 1 is welded to the connector which is welded to the muffler. It’s the same with header pipe 4.
It doesn’t really make a whole lot of difference, I guess. Because the next thing to be done, after removing and marveling at this monstrosity of an exhaust, is to lop off the mufflers on both sides.
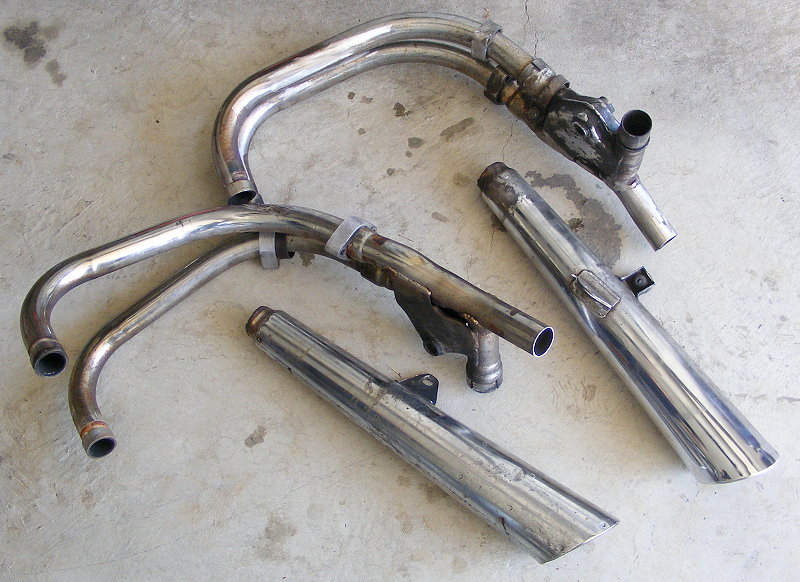
I went back and forth on what to do with the mufflers. Gut them. Drill them. Remove them. Do everything in between. In the long run, it wasn’t worth the time or effort to salvage and work with the cans. Rust had set in and the short megaphone look isn’t what I wanted to see. So off came the megaphones.
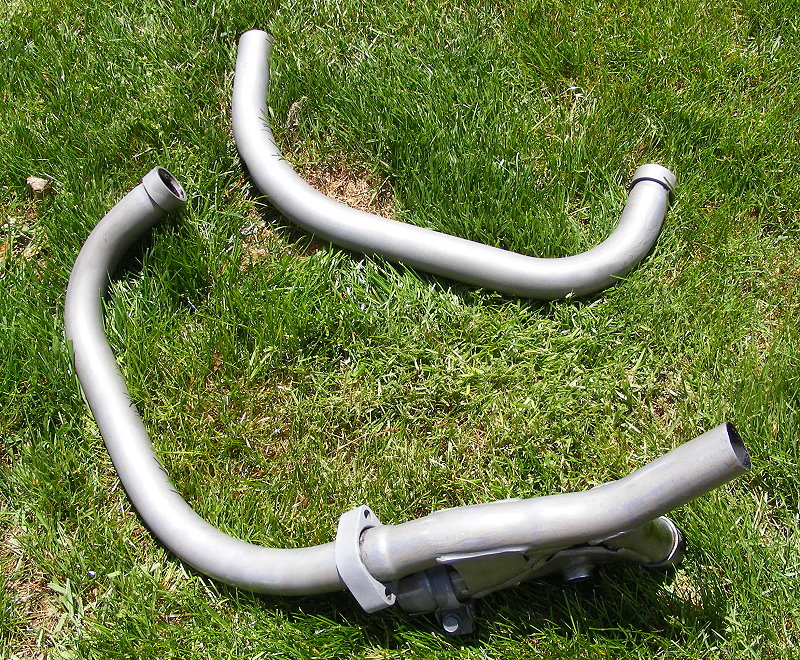
Next, the header pipes needed work. To begin, the pipes made a trip to the sandblasting cabinet to remove dirt and rust. High pressure and aggressive media took care of that—including the chrome—with no problem. I was surprised at how easily the chrome peeled off. Either my sandblaster rig is better than I thought or the chrome was thinly applied and weak from age. It came off easier than some paint that I’ve removed with media blasting.
With the headers cleaned up, it was time to take a good look at what I had. Number 1 header (below left) had minor scraping and flattening where the pipe makes a 90-degree turn from going downward to out the back of the bike. It’s typical for low-riding 4-2 exhausts to scrape on that pipe and in that place. Fortunately, the damage is light and doesn’t interfere with exhaust efficiency.
On the other side of the bike, we have the same deal with number 4 header pipe (below right). Conventional wisdom says most riders naturally turn to the left better or to the right better. “Better” meaning a tighter faster turn. I’m not sure that I agree because I don’t have a preference. But, I’m right handed and bat lefty but golf righty. So don’t go by me. On the other hand, the previous owner seems to have favored turning right because Number 4 pipe is scraped more and crushed flatter than Number 1.
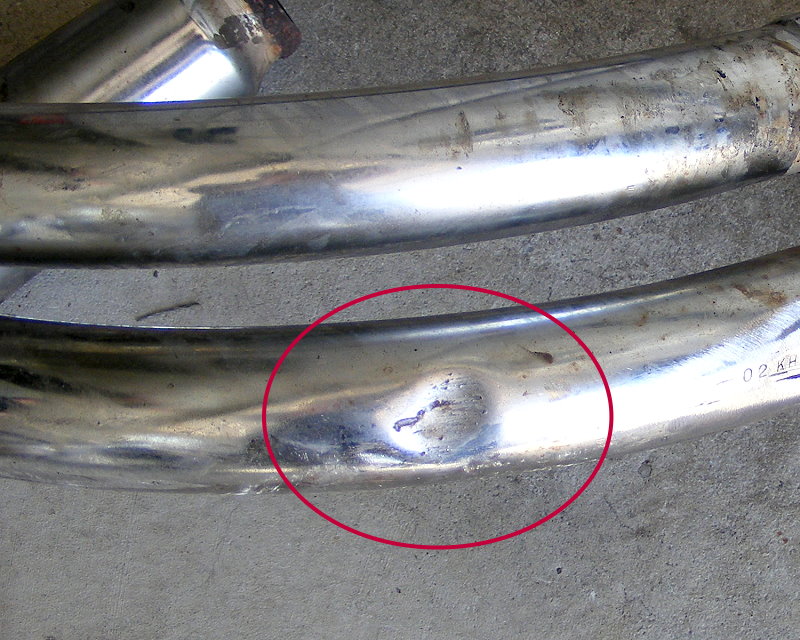
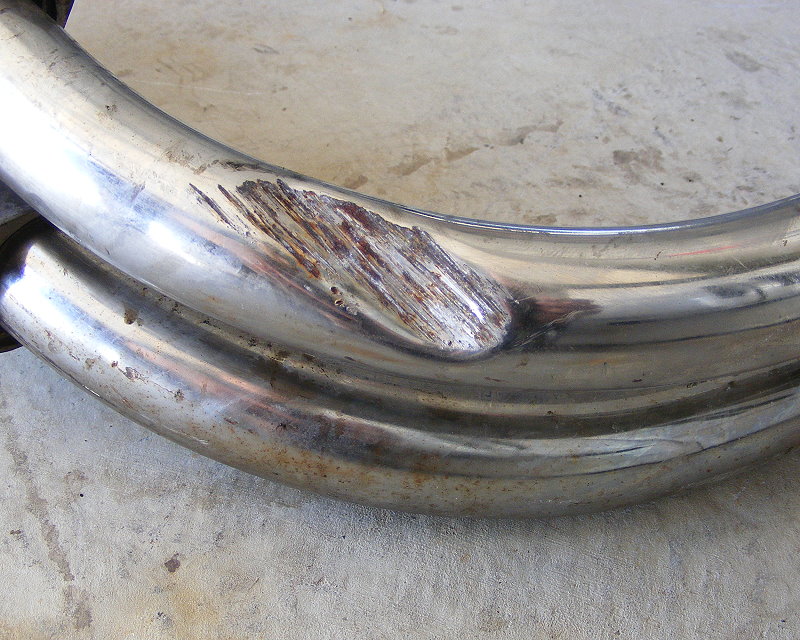
The dent on Number 4 is a couple inches in length and maybe 5/16 of an inch deep. I’m not a pro, but it looks like it would cause an issue for Number 4 cylinder and needs to be fixed.
Exhaust systems are expensive. I mean, some systems cost more than what I paid for the ZN. It’s ridiculous. Yes, I’ve indulged in that form of lunacy many times, too many times. Why? It’s fun to listen to the sound of a motor through a free-flowing exhaust. Different people like different sounds. We may even hear the same sound differently. I like a deep dark rumble, until the motor gets nasty with the throttle whacked all the way open. It’s the sound of my 2007 Victory Vegas with a Kerker 2-into-1 exhaust.
Common sense tells me the sound I get from my Vic is not the same sound I’ll get from the ZN. That’s okay. I remember the sound of my first street bike, a 1976 Honda SuperSport 4-into-1, and I like that sound just fine.
Besides sound, there’s performance. I purposely used the stock airbox on the ZN, rather than pods, to avoid carburetor and exhaust issues. My experience has been this. Changing the air intake leads to problems down the line, like excessive backfiring from the exhaust, especially when letting off the throttle. Changing the exhaust at the muffler doesn’t usually cause hiccups, unless there is no muffler; i.e., straight pipes. In any event, I’ll check the spark plugs to be safe once the bike is up and running.
Back to the repair on Number 4. Like all things, there are several ways to handle the repair. I decided to go at it from the opposite side of the damage. Instead of making an incision in the pipe on the opposite side, I drilled two holes large enough to fit a punch. The intent is to put a hammer to the punch and bang out the dent. These pipes are double walled pipes so I didn’t know how well it would work, if it worked at all.
Fortunately, the hammer and punch worked fairly well with heat from my Bernzomatic TS400 with MAP gas. Heating the damaged area to cherry red was a decided advantage over cold hammering.
Of course, the finished pipe looks slightly stippled. I had to expect that to some extent because any punch has a smaller diameter than the dent. I’m not as concerned with looks as I am with functionality. In my opinion, the dent’s repaired. Number 4 exhaust should flow freely again with no choking or obstruction. It should be good to go…after I fill up the holes, which is the topic of part 2. Stay tuned.
Next: Learning to MIG weld