
It’s been a while, no doubt. More life issues are getting in the way of living life. With that said, let’s move along…
The Victory is back on the road with a rewired tail, new micro switch at the front brake lever, rewired front turn signal and new wire harness for the Dakota Digital Performance Speedometer. Proper respect is due to Dakota Digital customer service. The unit lost the ability to change function due to a wire breaking free from the plug clip on the wire harness. The clip was small. I could barely see it, much less repair it. So I contacted Dakota Digital to ask if they’d repair it, even though the product was out of the 2-year warranty period. Rather than repair the harness, they sent me a new wire harness via Priority Mail, all at no charge. Will I use Dakota Digital again in the future? Absolutely.
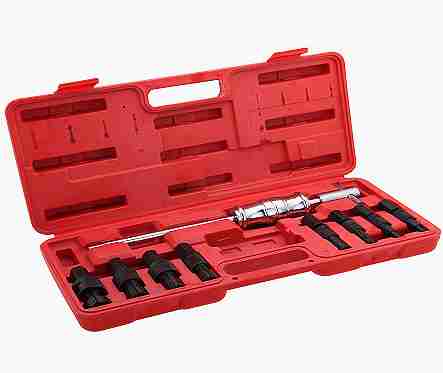 With the Victory fixed (just in time for the cold weather), I can turn my attention to the ZN again. The front end is the objet d’art, beginning with the wheel bearings. While other wheel bearings weren’t too much of a bear to tap out with a hammer and drift. These guys, on the front wheel, were the mother of all bears. So, I broke down and bought a wheel bearing puller set (right).
It always amazes me how much difference the right tool can make. And, it always makes me wonder why I waited so long to get the tool. Anyhow, once the puller got snugged up, the bearings were out in a minute, if that. The new bearings installed without a hitch.
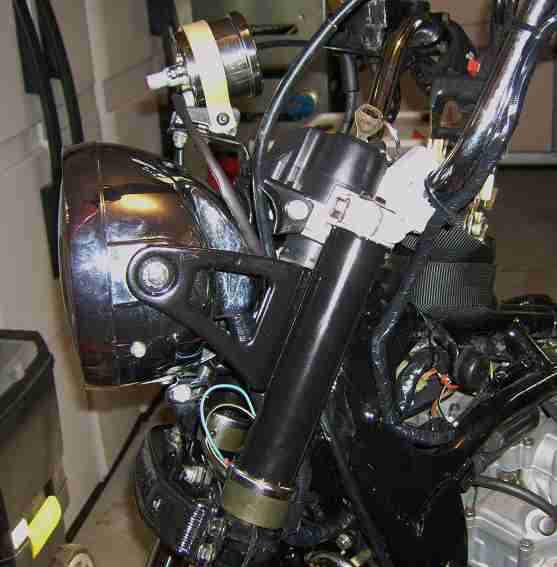
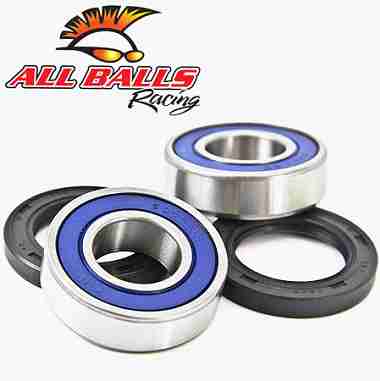 Next up were the forks. The inside of the fork legs were loaded with sludge, a lot of it. Mix sludge with fork oil to get a very black greasy oily mess. After running several cans of brake parts cleaner through the forks, the oil and dust seals were replaced with seals by All Balls Racing (right).
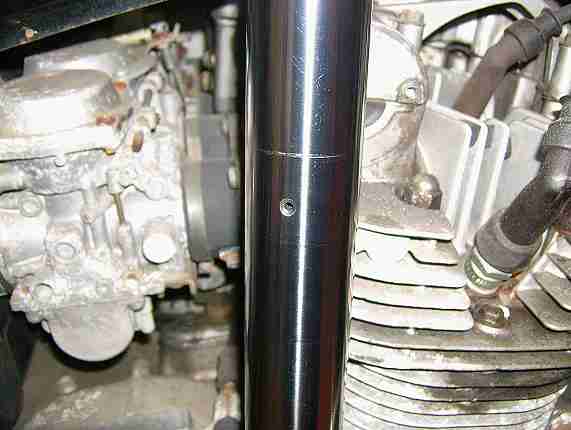
The forks are air assisted. A crossover tube between the fork legs keeps the air in the legs with four O-rings (which have taken weeks to land on my work bench but they’re due today…I digress). This means each fork leg has a little hole through which the air can pass and then takes up space in the leg (below). The thing with the little holes is that fork oil also likes to run out of them. It took many ‘accidents’ until I remembered they existed.
The manuals for the ZN state that the recommended oil is SAE 10W20. I’ve never heard of SAE 10W20 fork oil, ever. Are they recommending motor oil in front forks? There is SAE 10W20 motor oil but … I’ll stick with 20 weight PJ1 fork oil. Thank you very much.
While taking things apart on the front end, it’s a good idea to maintain the steering head. I think this maintenance item is generally overlooked by many/most riders. It’s not something that screams ‘broken’ or leaks or falls off or whatever. Even when there’s an indication that something might be wrong, like a front end wobble, the steering head isn’t the prime suspect.
Fortunately, the bearings at the steering head are tapered roller bearings rather than loose ball bearings that require counting the number of balls since they tend to roll away. The bearings and races looked good. So everything got a warm bath and soaking in Simple Green followed by a rinse with Brake Parts Cleaner and grease packing.
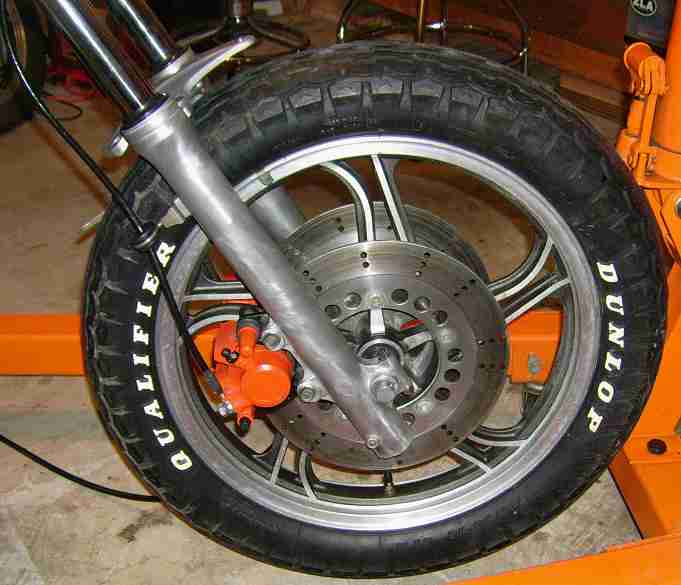
Speaking of brakes…the front dual calipers received a thorough cleaning, new pads, new seals, a new hose and fresh VHT Orange Brake Caliper paint. After bleeding enough brake lines, it was time for some help to make things go faster. This vacuum pump makes the job so easy. Yes. Another. Tool.
I can’t recommend the brand that’s linked above. I had several issues with the kit. A better name brand—like MityVac—would have been a better choice. For one thing, the reservoir jar lost its ability to seal after just a couple uses. A good replacement jar is the MityVac MVA6005 160z. fluid reservoir kit. My bikes would do fine with the 4-ounce jar; the 16-ounce jar is a buck or two more so…
Now, front dual calipers can (were) a big pain to bleed. Air bubbles like to play games. They move from the right side to the left side and back and forth they go. The end result is spending lots of time chasing bubbles. One solution that I like is the Mityvac MVA6007 Dual Adapter Brake Bleed Kit. The dual brake bleeder kit allows me to bleed both calipers at the same time. Between the vacuum pump and dual bleeder hose, bleeding the front brakes should be a breeze.
Well, it’s a breeze once the front brake master cylinder is rebuilt with the K & L Supply Master Cylinder Rebuild Kit 32-8061. No matter how much bleeding happened, the sponginess would not go away. It became obvious brake fluid was leaking past the seal in the master cylinder.
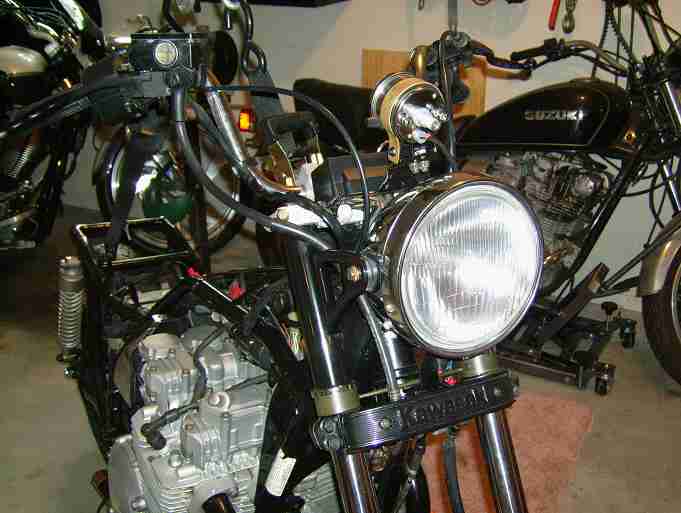
The front brakes function fine with no leaks on the lift. A minor adjustment to the light switch and the bike could be road tested, taking it easy at first to make sure the bike stops…which is as important—or even more so—as moving forward.
The bike is now ready for some exterior treatment to make it look a little more like a bobber. The headlight area was in fairly good condition. The bucket has nearly no rust, dents or dings. The headlight ears looked okay on the outside but there was rust on the sides facing the light. They got sandblasted clean and painted gloss black to match the brake junction cover.
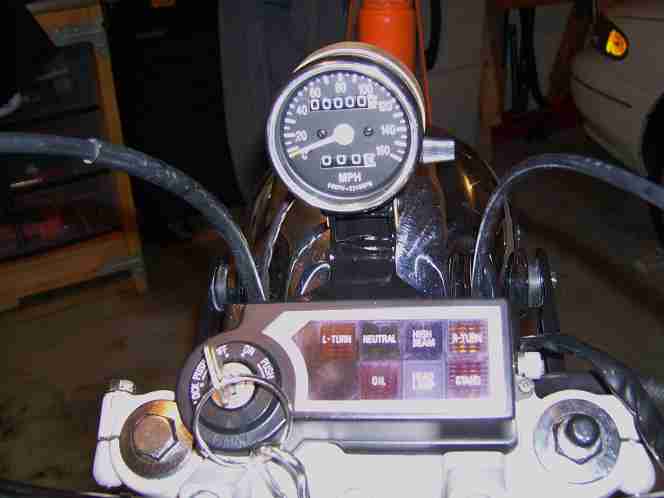
With the front end coming together, it was time to mount the new speedometer.

Early on in the project, I knew the gauges and some idiot lights would be deep sixed. The large meters don’t have a bobber look.
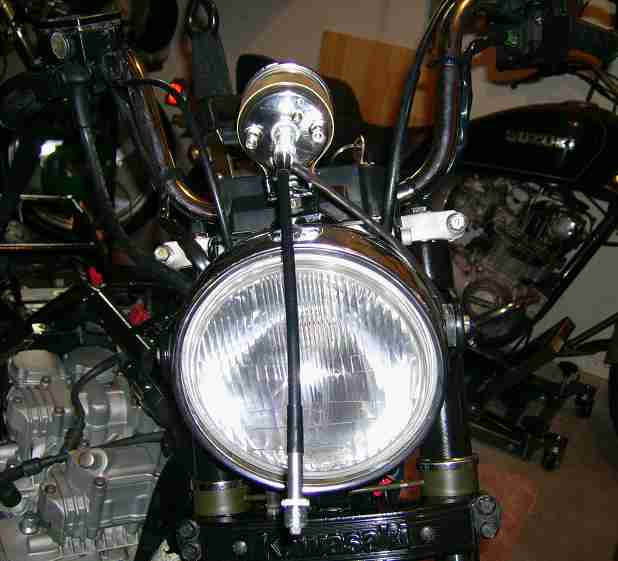
A 2.5” speedometer with custom bracket replaces the OEM speedometer. The bracket is a conglomeration of the OEM bracket and other bits and pieces.
Things were looking good. The view from the cockpit was good to go.
Well, it was good to go until I did the final speedometer hookup. At that point, this is what was looking at me…
Yeah, not good.
Looks like it’s time to cut, grind, wire brush, weld, sand and clean-up a new bracket.
The new bracket is waiting for paint. It’ll mount above the headlight but offset to the side. That way the cable will run straight up from the front wheel into the speedometer. I’ll post a pic at a later time.
Pennsylvania has yearly safety inspections on the vehicles registered in the state. One of the requirements for motorcycles is that the bike has a working high beam indicator. So as you see above, the bottom half of the instrument cluster with high beam idiot light was kept. A few of the light bulbs were burned out on the cluster and those were replaced with new Kawasaki 92069-1007 light bulbs.
And that’s that for now. There are a few loose ends to clean up from the above. However, I hope that my next post will be sooner rather than later. Of course, a lot depends on whether life continues to get in the way of living. Until then, diet and exercise.
Next: Bleeding brakes