
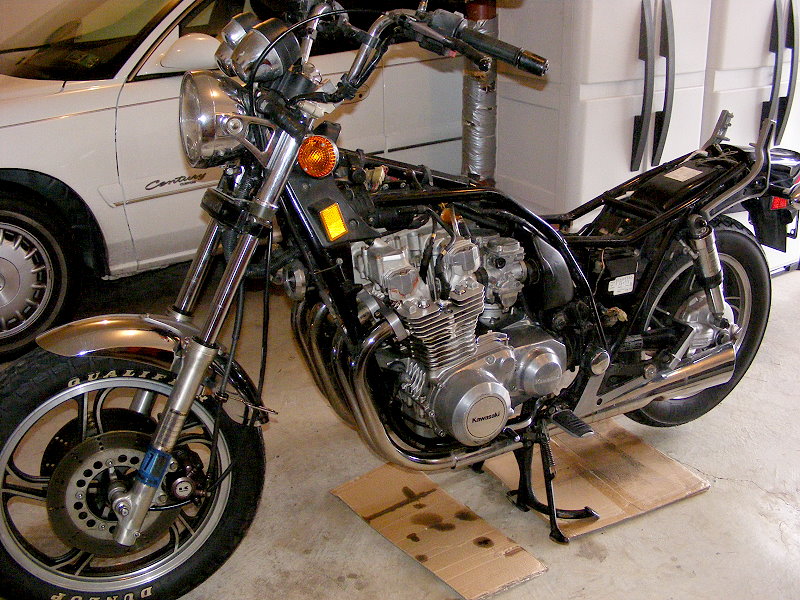
The bike’s been home three weeks now, and in between snowstorms here in the Northeast, I’ve been working towards the first major milestone: Will it turn over and will it start?
Here’s a list of what I’ve done so far. Although this work isn’t technically part of the ‘bobber’ process, if you’re starting with an old bike, you should thoroughly check all the systems before you get to the fun part—chopping.
- Carburetors
- Drained fuel from the carbs at the float bowl.
- Pulled the float bowls and ran carb cleaner through them and the jets.
- Made sure the floats and float needles move freely.
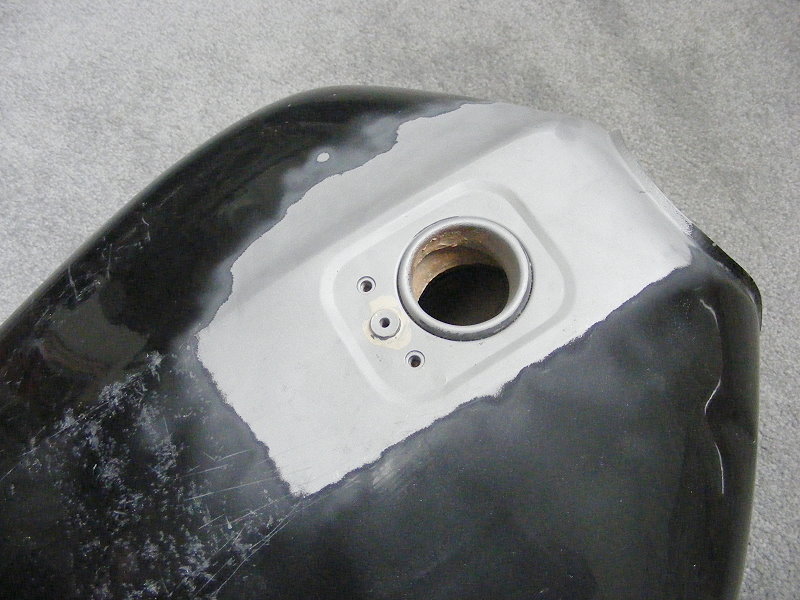
- Fuel Tank
-
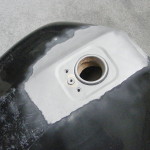
Stripping paint off tank Prepared to clean the interior of the fuel tank and prep the exterior for paint (right, in progress). Details to come in a separate post.
- Bought replacement gaskets and washers from Partzilla (see previous post on how to find OEM parts for old bikes). These small parts keep the gas in the tank. Most of these parts were worn out to where they were nearly dissolved into nothing.
-
- Fuel Delivery
- Removed the damaged and irreplaceable in-tank fuel filter. Replaced it with an in-line fuel filter. There are many in-line filters to choose from. They’re all inexpensive. They’re cheap insurance and peace of mind, if you know what I mean.
-
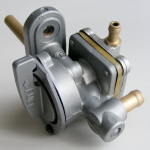
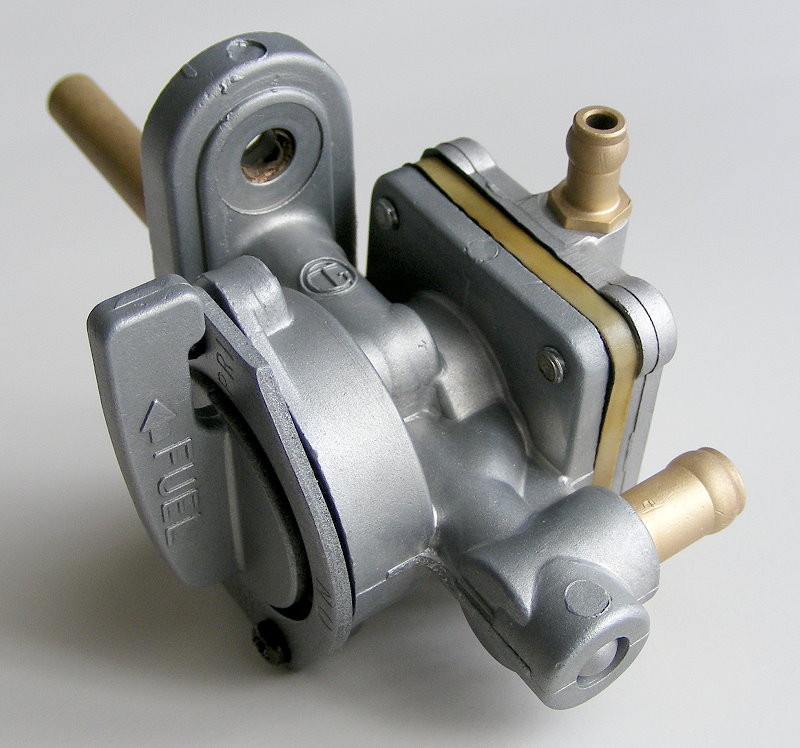
Rebuilt fuel petcock/tap Rebuilt the fuel petcock/tap with fresh gaskets and vacuum diaphragm found in a kit on eBay. Media-blasted the exterior with glass beads to clean and polish the surfaces. More on media/sand blasting in a future post.
- Replaced the fuel line from fuel tank to carburetor.
- Battery
- Purchased a new battery from Chrome Battery and put it on a Battery Tender to keep it charged.
- Oil
- Checked the level but did not change it yet.
- Spark Plugs
- Removed and replaced/cleaned
- Put a few drops of oil down the bores to lubricate the piston rings.
- Carb Boots (from air box to carbs)
- Checked for tight seal and/or damage. If the boots are a little soft and flexible, you may be able to loosen up with heat from a hair dryer, Rubber Renue, Lestoil or other products.
- My boots were too old and stiff to repair so they were replaced with a new set from Z1 Enterprises.
- Carb Holders (from carbs to engine)
- Visibly checked for damage, cracks, breaks and tight seal.
~ ~ ~ ~ ~
The goal here is to see if the bike turns over and starts (using a temporary or auxiliary fuel tank…more on that in a separate post). Basically, this is step one in getting it on the road. Once we know it starts, we’ll move to the next step involving a thorough check of the components and systems. But, first things first.
As I go through the bike, I try to clean whatever I can get my paws on. I love cleaners, and I mean all kinds of cleaners—brake cleaner, carb cleaner, electric cleaner, sea foam, degreasers, and I could go on and on…and I will in another post soon.
Other parts and consumable items will be needed such as oil, exhaust gaskets, left side engine gasket, several feet of fuel line, coil springs for the airbox hoses, small hose clamps, etc. I won’t list everything here because you’ll know what’s needed as you dig into the project. Old brittle parts will already be broken or missing, break as you remove them, found to be defective and whatever else goes on when resurrecting these extraordinary vintage bikes.
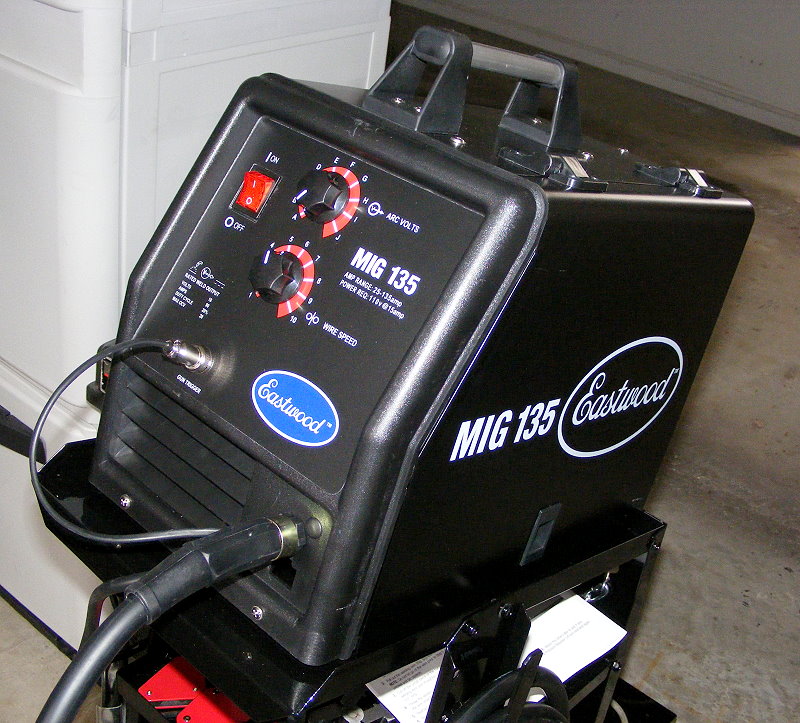
In addition to all that fun, I picked up an Eastwood 135 Amp welding machine. It was an unbelievable deal that I couldn’t pass up, even for a Hobart Handler 140. More on welding in a later post after I get better acquainted with the rig and drop some ‘bird poop’* in the garage.
Next: How to clean out a rusty fuel tank
_________
*bird poop = stringy, very ugly glob of metal made by a beginning welder like me.